
We will add further enemy behaviour patterns.
Contents
Previous tutorial
Open Enemy3’s ArborFSM in the Arbor Editor window in advance.
- Select an Enemy3 object from the Hierarchy window.
- Click the “Open Editor” button of the first Arbor FSM (Name is EnemyFSM).
Stop shot after time
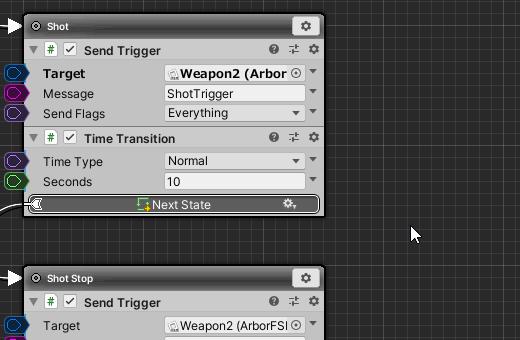
After 10 seconds, stop the winder shot.
- Click the Shot state setting icon.
- Select “Add Behaviour” from the menu.
- Select “Transition > TimeTransition” from the behaviour selection window.
- Change the added TimeTransition as follows.
| Seconds | 10 |
![]()
Create the transition destination state of TimeTransition.
- Drag “Next State” of TimeTransition of Shot state.
- Drop where nothing is on the graph.
- Select “Create State” from the menu.
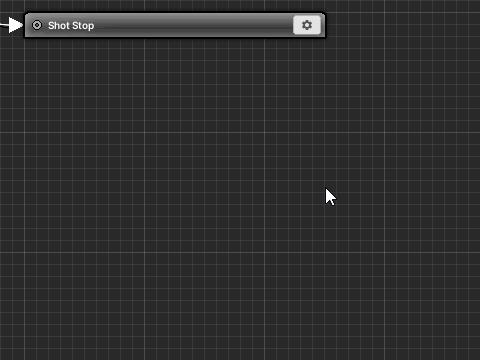
- Confirm by changing the state name to “Shot Stop”.
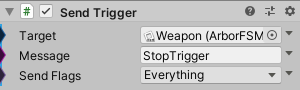
Add SendTrigger to Shot Stop state.
- Click the Shot Stop state setting icon.
- Select “Add Behaviour” from the menu.
- Select “Trigger > SendTrigger” from the behavior selection window.
- Change the added SendTrigger as follows.
| Target | Weapon2 object |
| Message | StopTrigger |

Let’s check the operation by pressing “![]() play button”.
play button”.
Weapon2’s attack will stop after 10 seconds.
Move to the left
Move it to the left side.
- Click the Shot Stop state setting icon.
- Select “Add Behaviour” from the menu.
- Select “Transition > GoToTransition” from the behavior selection window.
Create the transition destination state of GoToTransition.
- Drag “Next State” of GoToTransition of Shot Stop state.
- Drop where nothing is on the graph.
- Select “Create State” from the menu.
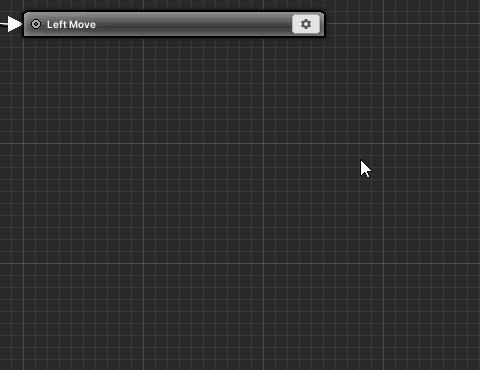
- Confirm by changing the state name to “Left Move”.
Use TweenRigidbody2DPosition to move it.
- Click the Left Move state setting icon.
- Select “Add Behaviour” from the menu.
- Select “Tween > TweenRigidbody2DPosition” from the behavior selection window.
- Change TweenRigidbody2DPosition as follows.
| TweenMoveType | Relative |
| To | (-2, 0) |

Shot aiming at player
When you finish moving to the left you start a shot aiming at the player.
Create a transition destination state of TweenRigidbody2DPosition.
- Drag “Next State” of TweenRigidbody2D Position in the Left Move state.
- Drop where nothing is on the graph.
- Select “Create State” from the menu.
- Confirm by changing the state name to “Shot 2”.
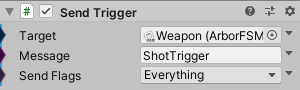
Copy the Send Trigger in the Shot state and paste it into Shot 2.
- Click the SendTrigger setting icon in the Shot state.
- Select “Copy” from the menu.
- Click the Shot 2 state setting icon.
- Select “Paste Behaviour” from the menu.
- Change the Send Trigger of Shot 2 state as follows.
| Target | Weapon object |
Let’s check the operation.
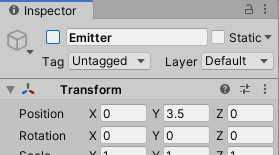
It is easy to check if the Emitter object that is automatically generating the enemy is invalidated and then started.
- Select “Emitter” from the Hierarchy window.
- Changed GameObject to inactive in the Inspector window.
- Press “
 Play Button” to execute.
Attack with Weapon2 for 10 seconds, move to the left and attack with Weapon.
Adding enemy bullets
After the passage of time, add enemy bullets to move towards the player.
- Select “Assets/Shooting Game/Prefabs/Enemy Bullet” in the Project window.
- Select “Edit > Duplicate” from the top menu.
- Renamed to “EnemyBullet2”.
Prefabs can be edited directly without having to place them in the scene.
Please open the created EnemyBullet2 in Arbor Editor.
- Click the “Open Editor” button of ArborFSM in the Inspector window of Enemy Bullet2.
Add TimeTransition to the Start state.
- Click the Start state setting icon.
- Select “Add Behaviour” from the menu.
- Select “Transition > Time Transition” from the behavior selection window.
- Change TimeTransition as follows.
| Seconds | 0.5 |
![]()
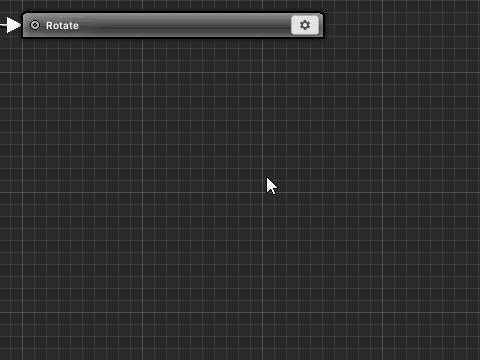
Create the transition destination state of TimeTransition.
- Drag “Next State” of TimeTransition.
- Drop where nothing is on the graph.
- Select “Create State” from the menu.
- Confirm by changing the state name to “Rotate”.
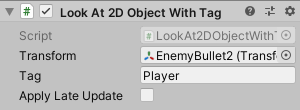
Turn around in the Rotate state.
- Click the Rotate state setting icon.
- Select “Add Behaviour” from the menu.
- Select “Scripts > LookAt2DObjectWithTag” from the behavior selection window.
- LookAt2DObjectWithTag is changed as follows.
| Transform | EnemyBullet2 prefab(Self) |
| Tag | Player |
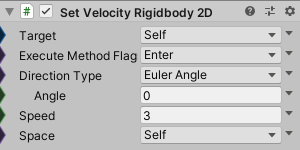
At the same time as changing direction to your own aircraft, change the moving speed.
- Click the setting icon of SetVelocityRigidbody2D in the Start state.
- Select “Copy” from the menu.
- Click the Rotate state setting icon.
- Select “Paste Behaviour” from the menu.
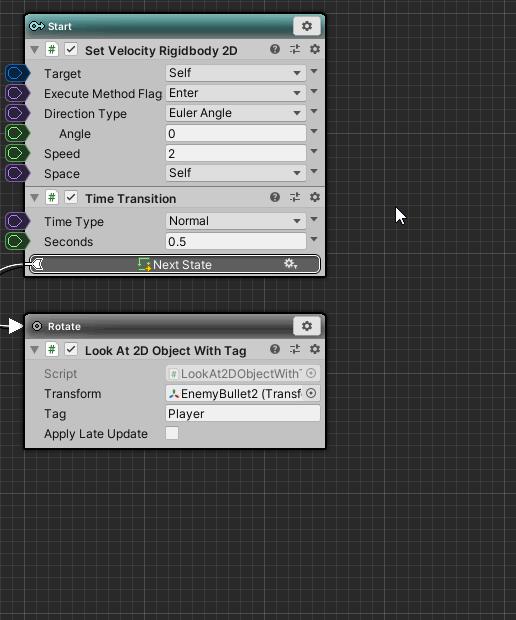
- Change SetVelocityRigidbody2D as follows.
| Speed | 3 |
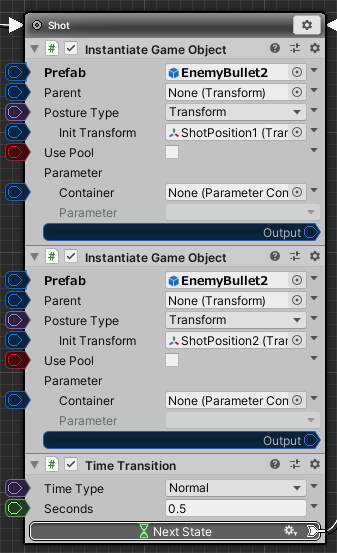
We will change bullets to fire from Weapon to EnemyBullet2.
Select weapon object and open it in Arbor Editor.
- Select a Weapon object from the Hierarchy window.
- Click the “Open Editor” button in the Inspector window.
- Changed the two InstantiateGameObjects in the Shot state as follows:
| Prefab | Assets/ShootingGame/Prefabs/EnemyBullet2 prefab |
Let’s check the operation by pressing “![]() play button”.
play button”.
The bullet fired from Weapon will turn toward itself after 0.5 seconds.
Return to winder firing
Please open ArborFSM of Enemy3 again.
Add TimeTransition to the Shot 2 state.
- Click the Shot 2 state setting icon.
- Select “Add Behaviour” from the menu.
- Select “Transition > Time Transition” from the behavior selection window.
- Change TimeTransition as follows.
| Seconds | 10 |
![]()
Create the transition destination state of TimeTransition.
- Drag “Next State” of TimeTransition.
- Drop where nothing is on the graph.
- Select “Create State” from the menu.
- Confirm by changing the state name to “Stop Shot2”.
Copy the SendTrigger from the Shot2 state and paste it into the Stop Shot2 state.
- Click the SendTrigger setting icon in the Shot2 state.
- Select “Copy” from the menu.
- Click the Stop Shot2 state setting icon.
- Select “Paste Behaviour” from the menu.
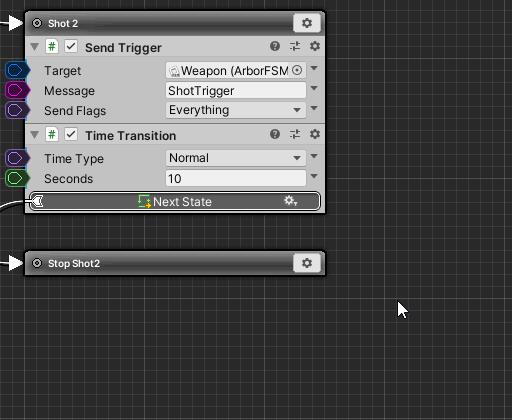
- Change SendTrigger as follows.
| Message | StopTrigger |
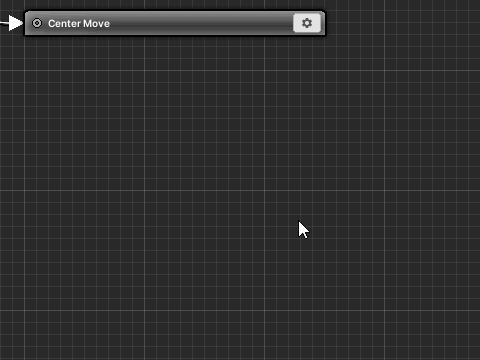
Add GoToTransition to Stop Shot2 state.
- Click the Stop Shot2 state setting icon.
- Select “Add Behaviour” from the menu.
- Select “Transition > GoToTransition” from the behavior selection window.
Create the transition destination state of GoToTransition.
- Drag “Next State” from GoToTransition.
- Drop where nothing is on the graph.
- Select “Create State” from the menu.
- Confirm by changing the state name to “Center Move”.
Add TweenRigidbody2DPosition to Center Move state.
- Click the Center Move state setting icon.
- Select “Add Behaviour” from the menu.
- Select “Tween > TweenRigidbody2DPosition” from the behavior selection window.
- Change TweenRigidbody2D Position as follows.
| Tween Move Type | Relative |
| To | (2, 0) |

- Connect the Shot state by dragging and dropping the “Next State” of TweenRigidbody2D Position.
Let’s check the operation by pressing “![]() play button”.
play button”.