
This time, I will explain how to make simple game like coin pusher using Arbor.
Contents
- 1 Prior knowledge
- 2 Operating environment
- 3 Preparation of tutorial project
- 4 Move Pusher object
- 5 Instantiate coins from Spawner object
- 6 Destroy the coin that hit the Saucer object
- 6.1 Added ArborFSM
- 6.2 Create Wait Trigger state
- 6.3 Add OnTriggerEnterTransition
- 6.4 Create a Component.GetGameObject Calculator node
- 6.5 Connect from Collider slot of OnTriggerEnterTransition
- 6.6 Create Trigger Enter state
- 6.7 Added DestroyGameObject
- 6.8 Setting of DestroyGameObject
- 6.9 Added GoToTransition
- 6.10 Transition connection
- 6.11 Change TransitionTiming
- 6.12 Operation check
- 6.13 Supplement (OnTriggerEnterDestroy)
- 7 Score
- 8 Show score
- 9 Final confirmation
- 10 Difference from Example 7 (Coin Pusher)
- 11 Next step
Prior knowledge
This tutorial requires knowledge of:
Operating environment
This tutorial is created in the following environment.
| Unity | 2019.4.39f1 |
| Arbor | 3.9.0 |
If you use a different version, please read as appropriate because there may be some differences from the explanation.
Preparation of tutorial project
Create project
First of all, please create a project for the tutorial.
| Project Name | ArborTutorial03 |
| Template | 3D |
| Assets to import | Arbor |
For information on creating projects and importing Arbor, please refer to “Preparation for using Arbor”.
Import tutorial package
This time, there are packages in which objects used in this tutorial are arranged in advance, please import here.
“Tutorial03” をダウンロード
Tutorial03-1.unitypackage – 3245 回のダウンロード – 54.42 KBFor details on how to import asset packages, see the Unity official manual “Importing local asset packages“.
If the package is corrupted
Previously, some browsers could corrupt the package file when downloaded.
If the package import fails, try downloading it in another browser.
Open the tutorial scene
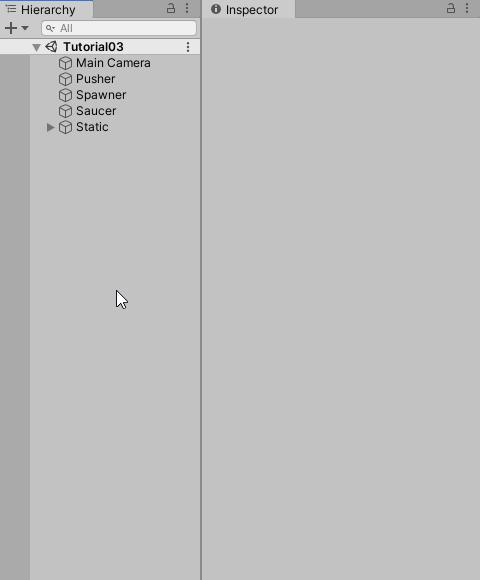
First of all, there are scenes in which objects are arranged in advance, please open here.
- Double-click “Assets/Tutorial03/Scenes/Tutorial03 Scene” from the Project window.
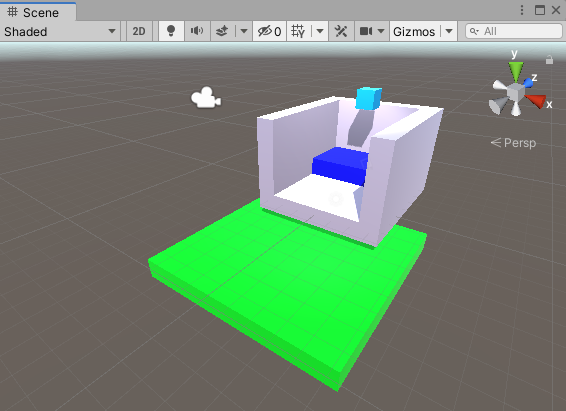
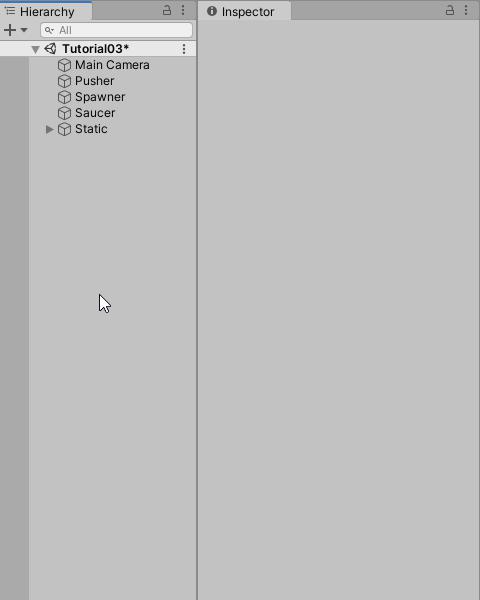
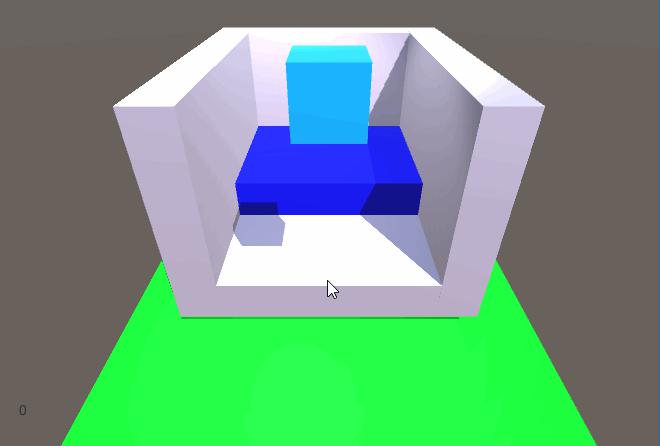
The scene where the object was placed opened, but since it has not set any behavior even if playing starts as it is, it does not hold as a game.
Move Pusher object
Let’s begin by moving the Pusher object to push and drop the coin.
Added ArborFSM
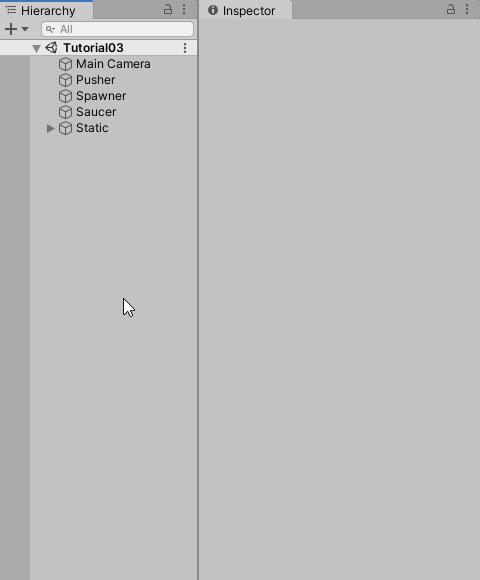
Add an ArborFSM component to the Pusher object.
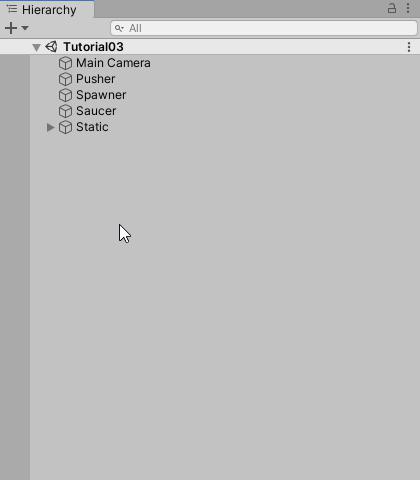
- Select the “Pusher” object from the Hierarchy window.
- Click the “Add Component” button in the Inspector window.
- Select ” Arbor > ArborFSM” from the component selection window.
- Click the “Open Editor” button of the added ArborFSM to open the Arbor Editor window.
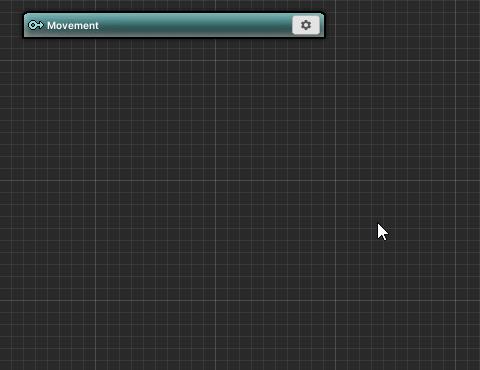
Creating a Movement state
Next, create a Movement state to move.
- Right-click on the empty area of the graph.
- Select “Create State” from the menu.
- Confirm the state name as “Movement”.
Add TweenRigidbodyPosition
This time, we will move it using TweenRigidbodyPosition.
- Click the Movement state setting icon.
- Select “Add Behaviour” from the menu.
- Select “Tween > TweenRigidbodyPosition” from the behavior selection window.
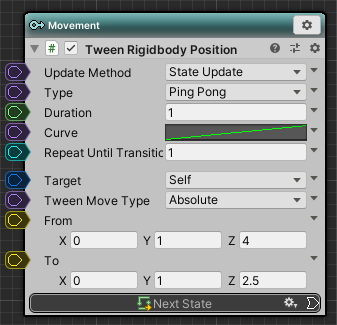
Setting of TweenRigidbodyPosition
We will set TweenRigidbodyPosition so that it moves repeatedly back and forth.
The items to change are as follows.
| Type | Ping Pong |
| From | (0, 1, 4) |
| To | (0, 1, 2.5) |
See “TweenRigidbodyPosition” for more information.
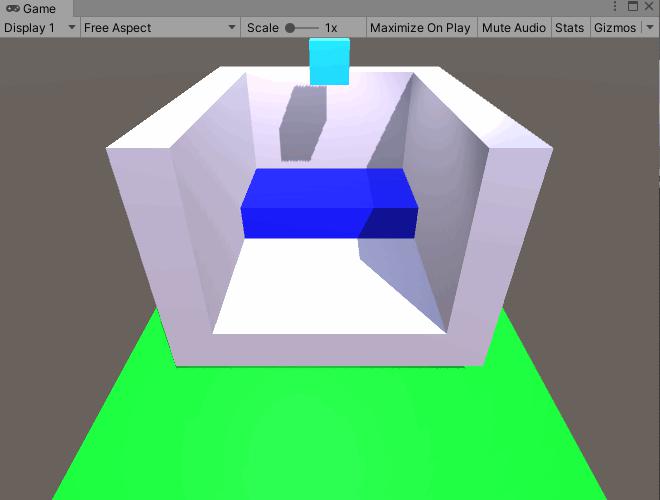
Operation check
You can see that the Pusher object goes back and forth when executed.
Instantiate coins from Spawner object
Next, create a process to instantiate a coin by pressing the Space key.
Added ArborFSM
- Select the “Spawner” object from the Hierarchy window.
- Click the “Add Component” button in the Inspector window.
- Select ” Arbor > ArborFSM” from the component selection window.
- Click the “Open Editor” button of the added ArborFSM to open the Arbor Editor window.
Creating a Wait Key state
Create Wait Key state to wait until space key is pressed.
- Right-click on the empty area of the graph.
- Select “Create State” from the menu.
- Confirm the state name as “Wait Key”.
Added KeyDownTransition
In this time, we will use KeyDownTransition to make transition when key is pressed.
- Click the Wait Key state setting icon.
- Select “Add Behaviour” from the menu.
- Select “Transition > Input > KeyDownTransition” from the behavior selection window.
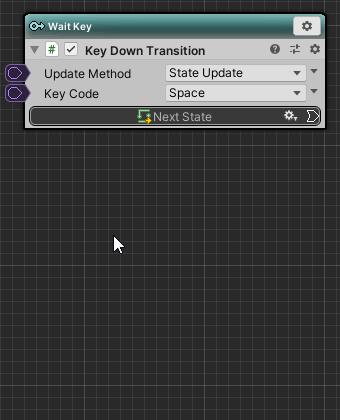
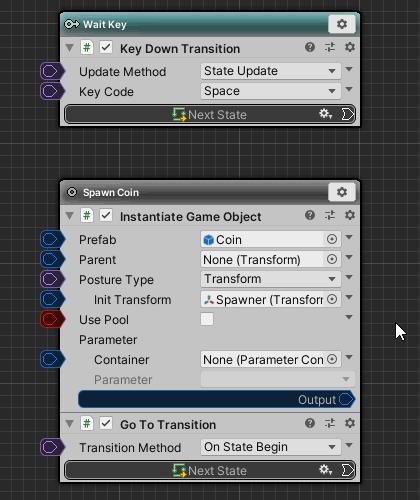
Setting KeyDownTransition
Set KeyDownTransition to transition with spacebar.
| Key Code | Space |
![]()
See “KeyDownTransition” for more information.
“Next State” has not yet another state, so set it later.
Creating Spawn Coin State
Next, create a Spawn Coin state that instantiates coins.
- Right-click on the empty area of the graph.
- Select “Create State” from the menu.
- Confirm the state name as “Spawn Coin”.
Add InstantiateGameObject
We use InstantiateGameObject to instantiate objects.
- Click the Spawn Coin state setting icon.
- Select “Add Behaviour” from the menu.
- Select “GameObject > InstantiateGameObject” from the behavior selection window.
Set InstantiateGameObject
Set it to instantiate a Coin object prepared as a Prefab.
| Prefab | Assets/Plugins/Arbor/Examples/17(Coin Pusher)/Prefabs/Coin object |
| Init Transform | Spawner object’s own Transform (It is the same even if you click the |
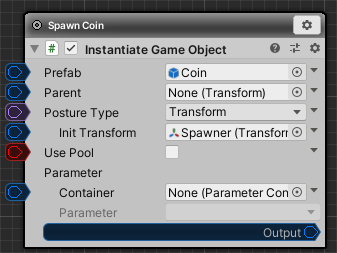
See “InstantiateGameObject” for more information.
Added GoToTransition
When coin generation is done, use GoToTransition to return to Wait Key state.
- Click the Spawn Coin state setting icon.
- Select “Add Behaviour” from the menu.
- Select “Transition > GoToTransition” from the behavior selection window.
See “GoToTransition” for more information.
Transition setting
Finally, set it to transit the wait key state and the spawn coin state.
- Connect from the “Next State” in the KeyDownTransition in the Wait Key state to the Spawn Coin state.
- Connect from the “Next State” in the GoToTransition in the Spawn Coin state to the Wait Key state.
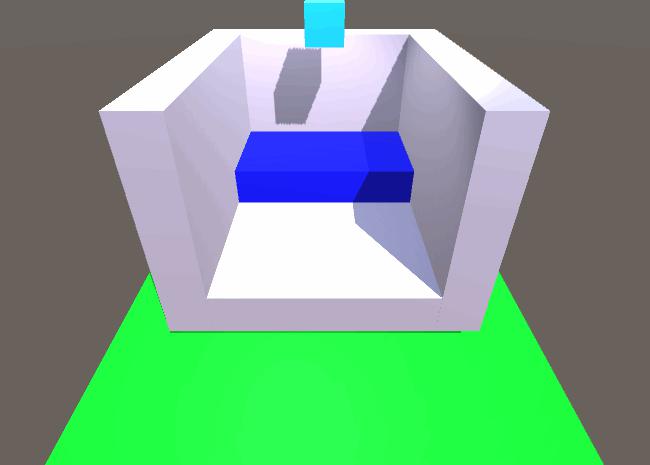
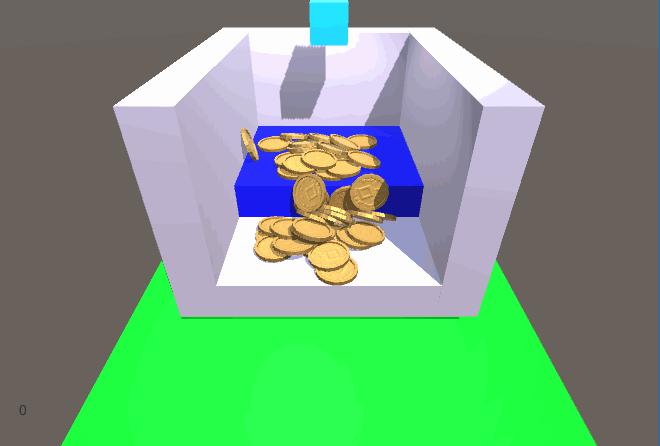
Operation check
You can see coins are instantiated from the Spawner object each time you press the Space key.
Destroy the coin that hit the Saucer object
Next, I will create a process when the coin falls.
Added ArborFSM
- Select the “Saucer” object from the Hierarchy window.
- Click the “Add Component” button in the Inspector window.
- Select ” Arbor > ArborFSM” from the component selection window.
- Click the “Open Editor” button of the added ArborFSM to open the Arbor Editor window.
Create Wait Trigger state
Then, when OnTriggerEnter comes, I will create a state for processing.
- Right-click on the empty area of the graph.
- Select “Create State” from the menu.
- Confirm the state name as “Wait Trigger”.
For details on OnTriggerEnter, refer to the “Triggers” section of the Unity manual “Introduction to collision“.
Add OnTriggerEnterTransition
Add OnTriggerEnterTransition to Wait Trigger state.
- Click the Wait Trigger state setting icon.
- Select “Add Behaviour” from the menu.
- Select “Transition > Collision > OnTriggerEnterTransition” from the behavior selection window.
Since it is only the coin to judge the contact, setting Is Check Tag and Tag is unnecessary.
In this example, we will extract the GameObject from the Collider slot via the Calculator node and create the action to destroy.
See “OnTriggerEnterTransition” for more information.
Create a Component.GetGameObject Calculator node
First, use the Component.GetGameObject Calculator node to get a GameObject from a component such as Collider.
- Right-click on an empty area near the right side of the Wait Trigger state.
- Select “Create Calculator” from the menu.
- Select “Component > Component.GetGameObject” from the calculator node selection window.
See “Component.GetGameObject” for more information.
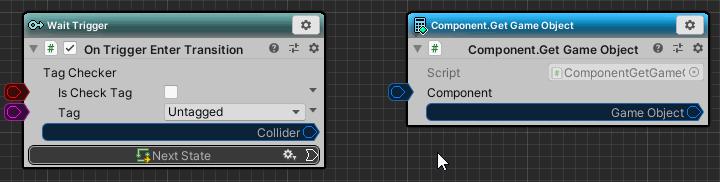
Connect from Collider slot of OnTriggerEnterTransition
Connect to Component.GetGameObject from Collider’s output slot and pass the value.
- Connect from the Collider slot of OnTriggerEnterTransition to the Component slot of Component.GetGameObject.
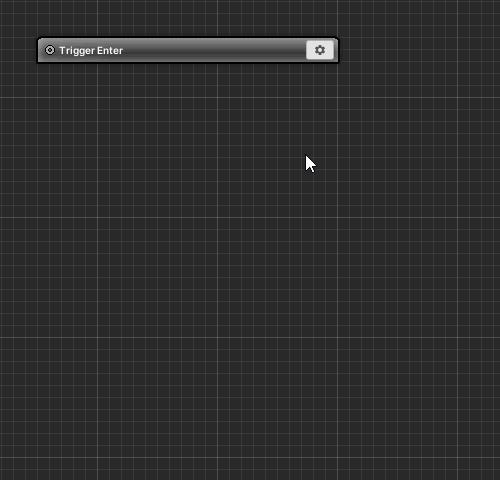
Create Trigger Enter state
Create a state for processing by Trigger Enter.
- Right-click on an empty area near the right side of the Component.GetGameObject calculator node.
- Select “Create State” from the menu.
- Confirm the state name as “Trigger Enter”.
Added DestroyGameObject
In the Trigger Enter state, add DestroyGameObject to Destroy the Coin object.
- Click the Trigger Enter state setting icon.
- Select “Add Behaviour” from the menu.
- Select “GameObject > DestroyGameObject” from the behavior selection window.
Setting of DestroyGameObject
Receives GameObject from Component.GetGameObject.
- Connect the GameObject slot of Component.GetGameObject to the Target slot.

See “DestroyGameObject” for more information.
Added GoToTransition
Add GoToTransition to transition from Trigger Enter state to Wait Trigger.
- Click the Trigger Enter state setting icon.
- Select “Add Behaviour” from the menu.
- Select “Transition > GoToTransition” from the behavior selection window.
Transition connection
- Connect from OnTriggerEnterTransition in the Wait Trigger state to Trigger Enter state.
- Connect from GoToTransition in the Trigger Enter state to Wait Trigger state.

Change TransitionTiming
Even if multiple coins come into contact at the same time, I want all the coins to be deleted, so I set it to transition immediately.
- Click the “Next State” setting icon of OnTriggerEnterTransition in the Wait Trigger state.
- Changed Transition Timing in the setting window to Immediate.
Likewise, GoToTransition will also be changed to Immediate to instantly return to the Wait Trigger state as soon as coins are deleted.
- Click the “Next State” setting icon of GoToTransition in the Trigger Enter state.
- Changed Transition Timing in the setting window to Immediate.
See “TransitionTiming” for more information.
Operation check
First press “![]() Play button” to execute.
Play button” to execute.
I want to confirm deleting the coin, so adjust the position of the Spawner object so that it falls directly to Saucer.
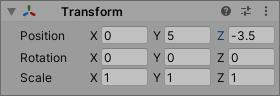
Set the Z coordinate of the Spawner object to -3.5.
(When you finish playing, you will return to the original position. If you have changed it outside of play, return the Z coordinate to 3.)
Then, in the Game window, press the Space key and confirm that the removed coins are deleted the moment they touch the Saucer object.
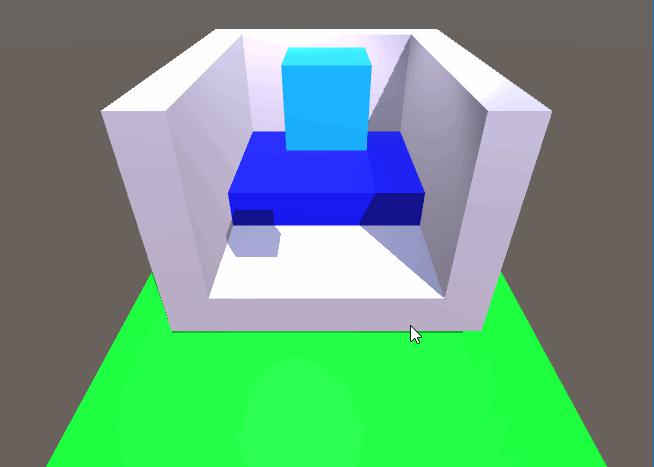
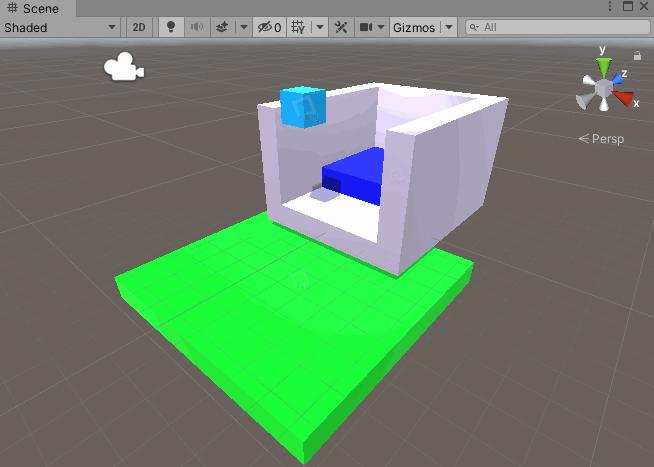
If it is difficult to understand that it was deleted, it is easy to see the Scene window.
Supplement (OnTriggerEnterDestroy)
You can also use OnTriggerEnterDestroy if you just delete coins that touched the Saucer object.
OnTriggerEnterDestroy is a behavior to delete the target game object.
See “OnTriggerEnterDestroy” for more information.
This time, I have introduced another method because I want to do other than deletion processing.
Score
Let’s add a score next.
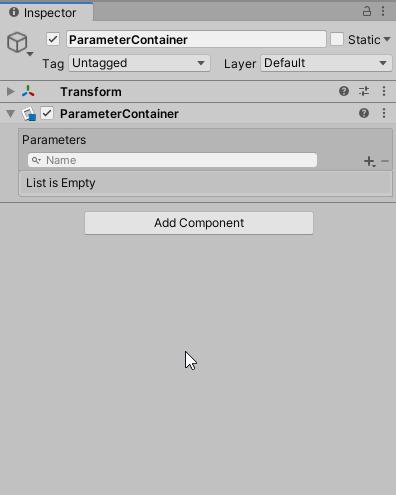
Create a ParameterContainer object
Create a Score parameter using ParameterContainer.
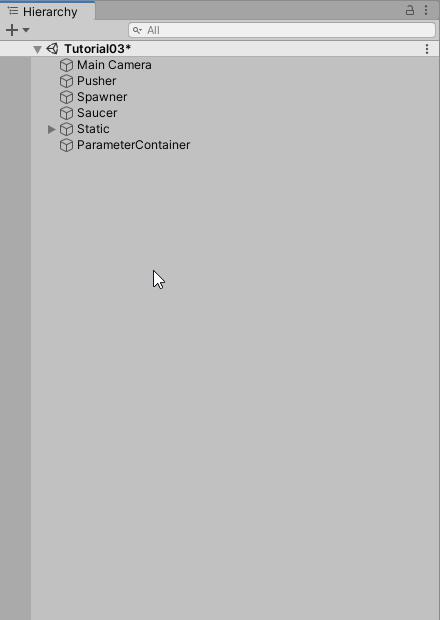
- Click the + button on the Hierarchy window.
- Select “Arbor > Parameter Container” from the menu.
ParameterContainer is a component for storing parameters used by ArborFSM.
See “ParameterContainer” for more information.
Add Score parameter
Add the Score parameter from the Inspector of the created ParameterContainer.
- Click the + button.
- Select “Primitive > Int” from the parameter selection window.
- Rename the created parameter to “Score”.
Add CalcParameter
If you do not open the state machine of Saucer with Arbor Editor, please open it from the Open Editor button.
In the Saucer’s Trigger Enter state, add CalcParameter to increase the Score parameter.
- Click the Trigger Enter state setting icon.
- Select “Add Behaviour” from the menu.
- Select “Parameter > CalcParameter” from the behavior selection window.
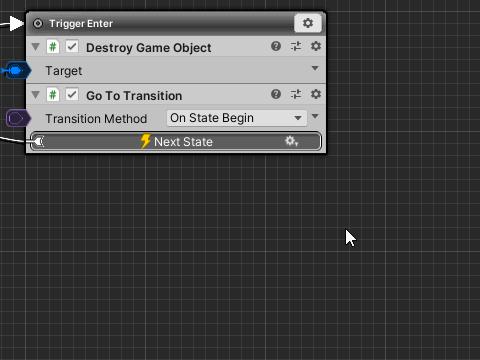
CalcParameter is the behavior to compute each parameter of ParameterContainer.
See “CalcParameter” for more information.
Change the position of CalcParameter
Since CalcParameter is below GoToTransition, transition processing has priority.
Let’s change CalcParameter above GoToTransition.
- Start dragging the title bar of CalcParameter
- Drop between DestroyGameObject and GoToTransition.
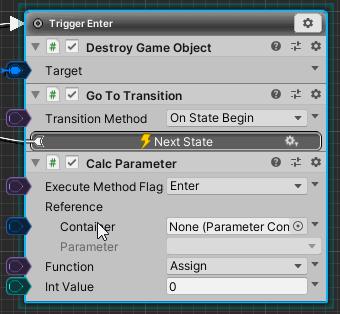
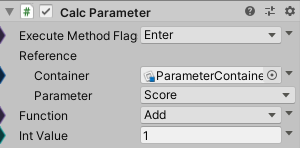
Setting of CalcParameter
Set CalcParameter to increment the Score parameter by 1.
| Reference | |
| Container | ParameterContainer object created |
| Parameter | Score parameter |
| Function | Add |
| Int Value | 1 |
Now you can set 1 to increase for Score parameter.
Operation check
First of all, press “![]() play button” to execute.
play button” to execute.
In order to confirm that the score increases, adjust the position of the Spawner object so that the coin falls directly to Saucer.
Set the Z coordinate of the Spawner object to -3.5.
(When you finish playing, you will return to the original position. If you have changed it outside of play, return the Z coordinate to 3.)
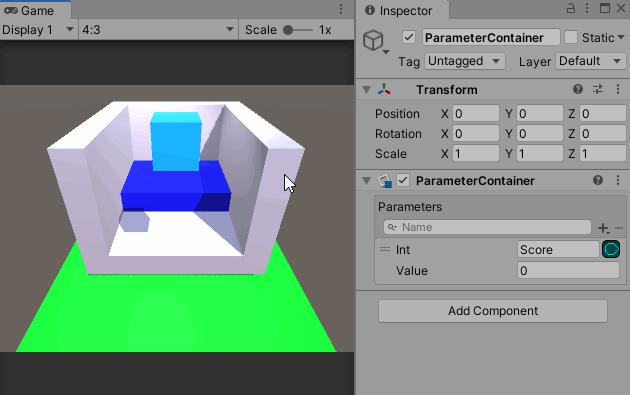
Then, select ParameterContainer object from Hierarchy and display Inspector.
If you press the space key in the Game window and the coin disappears, you can see that the Score parameter is increasing at the same time.
Show score
Let’s try to display the score in UI at the end.
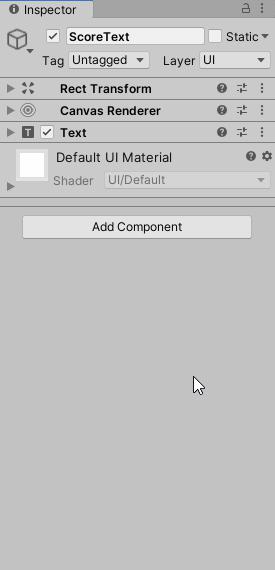
Create a ScoreText object
- lick the + button on the Hierarchy window.
- Select “UI > Text” from the menu.
- In Unity2021 or later, select “UI > Legacy > Text”.
- Changed the object name to “Score Text”.
Set RectTransform of ScoreText
Adjust the position of ScoreText to a visible position.
- Change Anchor to bottom left.
- Change PosX to 100.
- Change PosY to 30.
| Anchor | Bottom left |
| Pos | (100,30,0) |
![]()
Added ArborFSM
Add ArborFSM to the ScoreText object.
- Click the “Add Component” button in the ScoreText object’s Inspector window.
- Select ” Arbor > ArborFSM” from the component selection window.
- Click the “Open Editor” button of the added ArborFSM to open the Arbor Editor window.
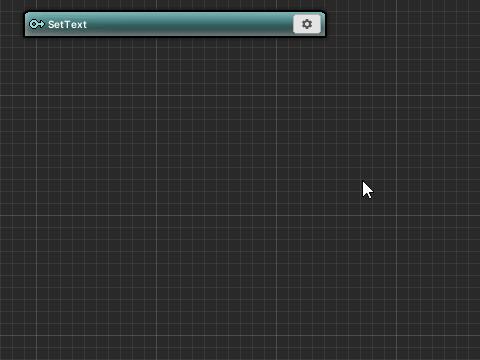
Create SetText state
To set the text, create a state named SetText.
- Right-click on the empty area of the graph.
- Select “Create State” from the menu.
- Confirm the state name as “SetText”.
Added UISetTextFromParameter
Use UISetTextFromParameter to set UIText from the Score parameter.
- Click the Trigger Enter state setting icon.
- Select “Add Behaviour” from the menu.
- Select “UI > UISetTextFromParameter” from the behavior selection window.
Setting UISetTextFromParameter
We will set the UIText to update every time the Score parameter is changed.
| Parameter | |
| Container | ParameterContainer object |
| Parameter | Score parameter |
| Change Timing Update | Check |

See “UISetTextFromParameter” for more information.
Operation check
First of all, press “![]() Play button” to execute.
Play button” to execute.
In order to confirm that the score increases, adjust the position of the Spawner object so that the coin falls directly to Saucer.
Set the Z coordinate of the Spawner object to -3.5.
(When you finish playing, you will return to the original position. If you have changed it outside of play, return the Z coordinate to 3.)
You can see that the ScoreText display changes each time the coin falls on the Saucer object by pressing the Space key in the Game window.
Final confirmation
Let’s check through all lastly whether it all works properly.
Press “![]() Play button” to execute.
Play button” to execute.
Please check whether it is correctly pushed by Pusher object or falling to Saucer by pressing Space key in Game window.
(GIF was taken after taking out some coins)
Difference from Example 7 (Coin Pusher)
Coin Pusher is also included in the example of Arbor package.
In this tutorial, I am not going to make a game clear judgment etc, but in the example version we are going to check once.
The rough differences are as follows.
- Added flow from start to game over to Stage object
- Added to reduce the score every time you issue a coin from Spawner.
(If you do not have a score you can not even have coins)
Next step
This completes the “Let’s make a coin pusher”.
“Let’s make a coin pusher” complete tweets
Next time is “Let’s make an enemy of 2DSTG“.
I will explain how to control enemy movement and weapon behavior with Arbor.