
This time, we will explain how to create your own script, such as log output to know the timing of state change and definition of state transition by original condition.
Contents
- 1 Prior knowledge
- 2 Operating environment
- 3 Create tutorial project
- 4 Create a log output script
- 5 What is StateBehaviour?
- 6 Log output when entering state
- 7 Create ArborFSM object
- 8 State creation
- 9 Add DebugLogBehaviour
- 10 Confirm the operation so far
- 11 Declaration of parameters
- 12 DebugLogBehaviour setting
- 13 Confirm the operation so far
- 14 Declare state transition destination specification
- 15 Create another state
- 16 Connect StateLink
- 17 Operation check
- 18 Next step
Prior knowledge
This tutorial requires knowledge of:
- Basics of C#
- Unity Manual “Scripting“
- State machine basics
Operating environment
This tutorial is created in the following environment.
| Unity | 2019.4.39f1 |
| Arbor | 3.9.0 |
If you use a different version, please read as appropriate because there may be some differences from the explanation.
Create tutorial project
First of all, please create a project for the tutorial.
| Project Name | ArborTutorial02 |
| Template | 3D |
| Assets to import | Arbor |
For information on creating projects and importing Arbor, please refer to “Preparation for using Arbor“.
Create a log output script
This time, let’s create a StateBehaviour that can set the behavior of the state.
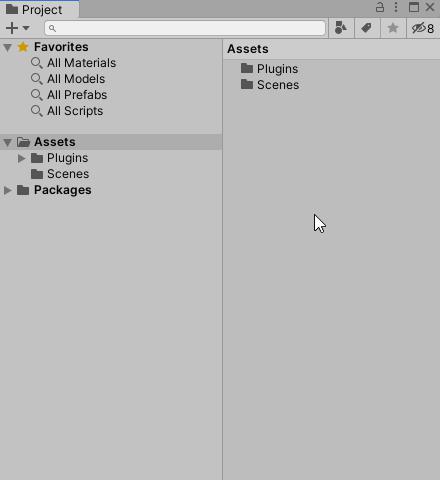
- Select the Assets folder in the Project window.
- Click the + button in the Project window.
- Select “Arbor > StateBehaviour C# Script” from the menu.
- Please note that it is not a “C # Script” that creates a regular script.
If you accidentally create it with “C # Script”, delete the file and recreate it.
- Please note that it is not a “C # Script” that creates a regular script.
- Change the script file name to “DebugLogBehaviour”.
- It will automatically switch to the name input mode, so enter the file name as it is.
- If you decide to keep the default name once, or if you change the name by mistake later, you need to correct the class name as well.
What is StateBehaviour?
StateBehaviour is a script that can describe the state behavior of ArborFSM like TimeTransition and ActivateGameObject used in “State machine basics” section.
In addition to control for state, you can use editable parameters and callback like OnCollisionEnter like MonoBehaviour.
Double-click the DebugLogBehaviour file you just created to open it in a code editor (such as Visual Studio).
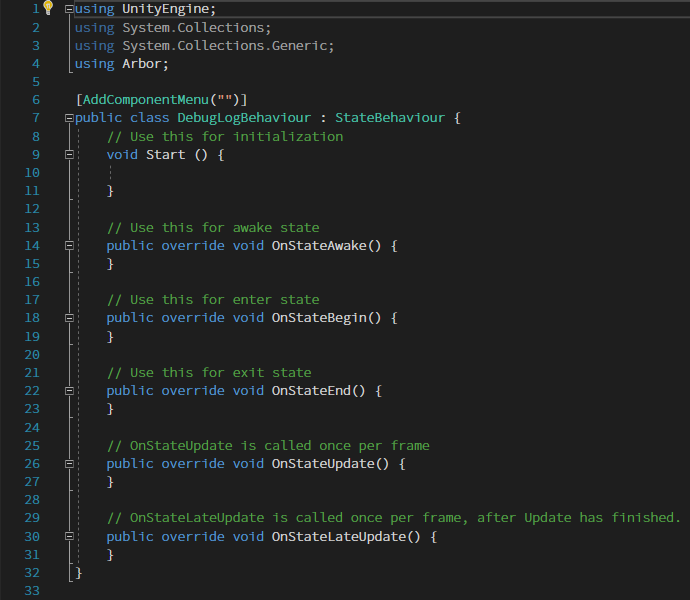
For newly created scripts, commonly used callbacks are predefined in general.
This OnStateAwake (), OnStateBegin (), and others are callback methods involved in state control.
In brief explanation, it plays the following role.
| OnStateAwake() | This is called only once before OnStateBegin () at the time of entering the state for the first time. |
| OnStateBegin() | This is called when FSM enter the state. |
| OnStateEnd() | This is called when FSM leave the state. |
| OnStateUpdate() | This is called every frame while entering the state. As the call timing, it is the same as MonoBehaviour.Update(). |
| OnStateLateUpdate() | This is called after every frame Update () while entering the state. As the call timing, it is the same as MonoBehaviour.LateUpdate(). |
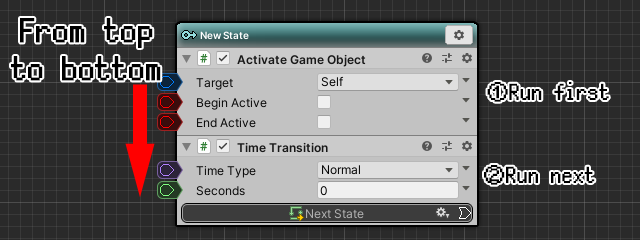
Also, if you have added multiple behaviors to one state, these callbacks are called in order from the top when you see them in the Arbor Editor window.
See “StateBehavior” for more information.
Log output when entering state
First of all, let’s check the logs displayed at the time of entering the state and make sure that the script is running normally.
Open DebugLogBehaviour created earlier with a code editor (Visual Studio, etc.) and write in OnStateBegin method.
In addition, we will only describe the edited places, so please understand.
- Change OnStateBegin method as follows.
public override void OnStateBegin() {
	Debug.Log("OnStateBegin : " + state.name);
}
Since the state setting script can be referred to by the state property, we also make state name out there in the log.
If you can write it, save the file and return to Unity.
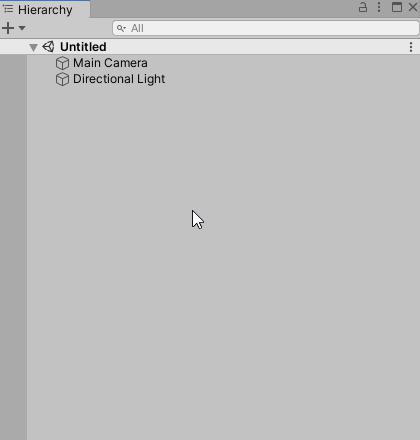
Create ArborFSM object
Create an ArborFSM object to make the state machine available.
- Click the + button on the Hierarchy window.
- Select “Arbor > ArborFSM” from the menu.
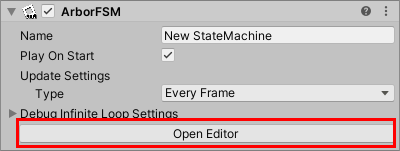
Display the created ArborFSM in the Arbor Editor window.
- Select ArborFSM object.
- Click the “Open Editor” button in ArborFSM of Inspector.
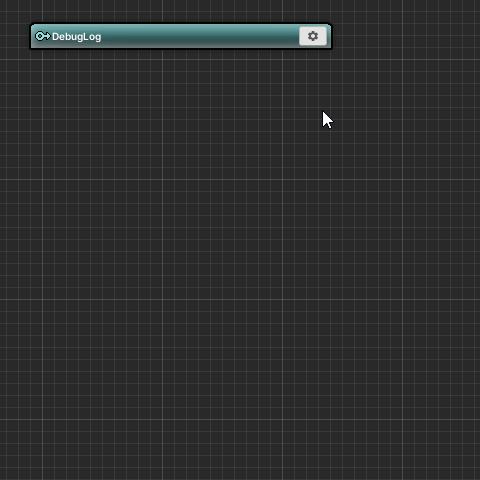
State creation
Create a state.
- Right-click on the empty area of the graph.
- Select “Create State” from the menu.
- The state name is “DebugLog”.
Add DebugLogBehaviour
Add DebugLogBehaviour to the DebugLog state.
The created script will be stored in the Scripts group of the behaviour selection window by default.
- Click the DebugLog state setting icon.
- Select “Add Behaviour” in the menu.
- Select “Scripts > DebugLogBehaviour” in the behaviour selection window.
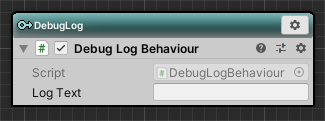
Since DebugLogBehaviour has no parameters, there is no need to set anything, so it is complete.
Confirm the operation so far
Let’s run once here and check it.
If the Console window is not displayed, select “Window> General> Console” from the top menu to display it.
![]()
- Press “
 Play button” to check the Console window.
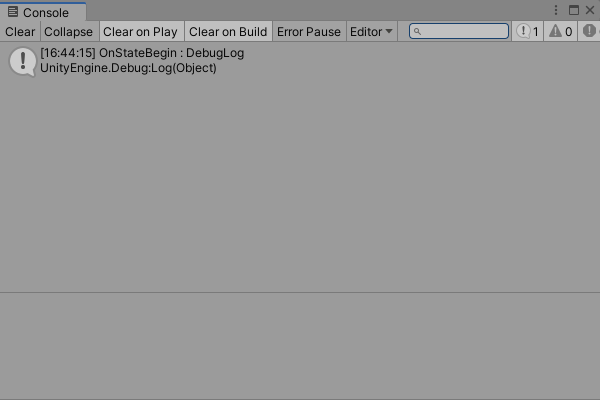
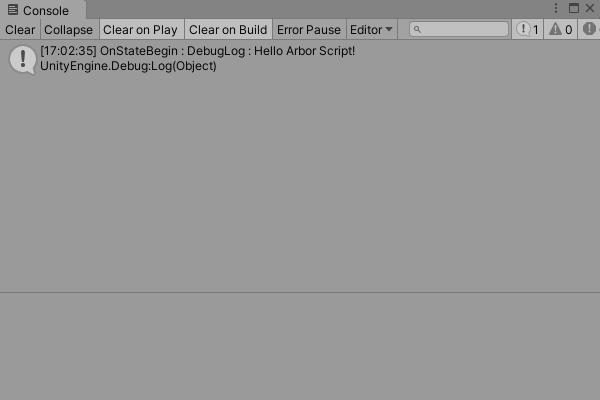
Then, OnStateBegin method of DebugLogBehaviour added to the DebugLog state is called, and the log described earlier is now displayed.
Declaration of parameters
Next, let’s declare the parameters in the DebugLogBehaviour and allow it to be set in Arbor Editor.
Open DebugLogBehaviour in the code editor and define the member variables.
Since Arbor can declare parameters by Unity serialization function, the basic is the same as MonoBehaviour.
In this time, add a string to this DebugLogBehaviour and add it to the log with OnStateBegin method to confirm the operation.
- Add member variables as follows.
public string logText;
- Change OnStateBegin method as follows.
public override void OnStateBegin() {
	Debug.Log("OnStateBegin : " + state.name + " : " + logText);
}
If you save the file and return to Unity, it will be recompiled and the script changes will be reflected.
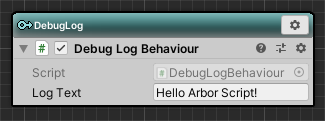
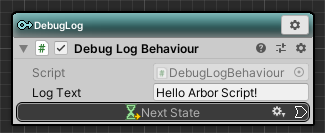
DebugLogBehaviour setting
Looking at the Arbor Editor window, I think that the parameters added are displayed.
Let’s type “Hello Arbor Script!” Into this added Log Text.
Confirm the operation so far
Let’s check whether the log is displayed correctly.
Please press “![]() Play button” to put it in the execution state and look at the Console window.
Play button” to put it in the execution state and look at the Console window.
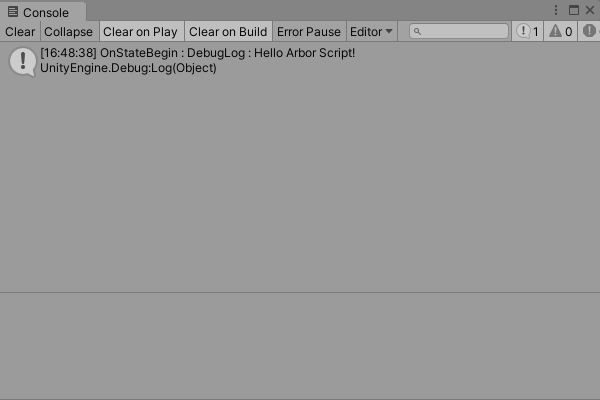
I think that you can see that the character string entered in Log Text has been added to the log.
In this way, you can edit the parameters added in StateBehaviour from the Arbor Editor and set the behavior.
Declare state transition destination specification
When StateLink is declared as a member variable, a transition button is displayed and it becomes possible to specify it.
This time, I will make a transition when the space key is entered.
Let’s open DebugLogBehaviour in the code editor and modify the script.
- Add member variables as follows.
public StateLink nextState;
- Change OnStateUpdate method as follows.
public override void OnStateUpdate() {
	if (Input.GetKeyDown(KeyCode.Space)) {
		Transition(nextState);
	}
}
Let’s save the file and return to Unity.
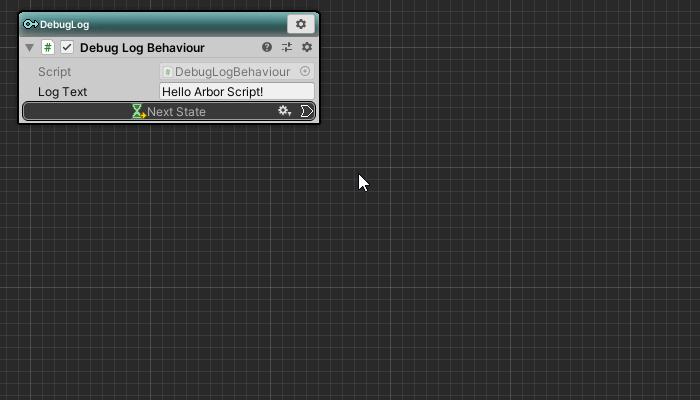
You can see that “Next State” has been added to the DebugLogBehaviour in the DebugLog state.
Create another state
Since there is only one state, I will create another state and try to make the transition clearer.
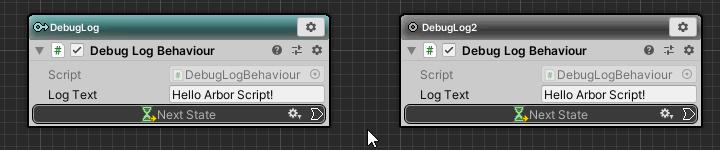
This time we will duplicate the DebugLog state.
- Click the DebugLog state setting icon.
- Select “Duplicate” from the menu.
Change it because it is indistinguishable if the name remains the same.
- Double click on the name field of the newly added state.
- Change the name to “DebugLog2”.

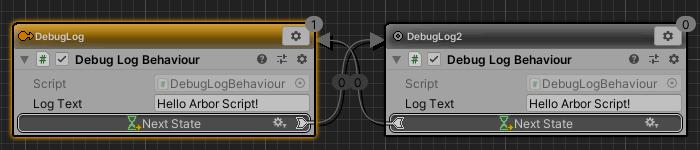
Connect StateLink
Connect StateLink of each state to make transition.
- Connect “Next State” of DebugLog state to DebugLog2 state by drag & drop.
- Connect “Next State” of DebugLog2 state to DebugLog state by drag & drop.
Now the state transitions each time the space key is pressed, and the log is displayed in the Console.
Operation check
Let’s check the operation at the end.
- Press “Play button” to put it in the execution state.
- Activate the Game window and press while pressing the space key while looking at the Console window.
You can see that the state switches each time you press the space key and the log is output.
If you also check the Arbor Editor window, you can confirm that the state is switched normally.
Refer to “Data flow” for more detailed customization methods such as passing data between states and calculator nodes.
Next step
That’s it “Coding” is complete.
“Coding” complete tweets
Next time is “Let’s make a coin pusher”.
I will create a simple game like a coin pusher using Arbor.