
This time I will explain the basics of the behaviour tree.
Contents
- 1 What is Behaviour Tree
- 2 Preparing the tutorial project
- 3 Preparing to use behaviour trees
- 4 Execute action
- 5 Execute nodes in order by Sequencer
- 6 Select execution of child nodes by Selector
- 6.1 About Selector
- 6.2 About decorators
- 6.3 About the CalculatorCheck decorator
- 6.4 Move the Wait2 node
- 6.5 Create Selector Composite Node
- 6.6 Connect Sequencer node and Selector node
- 6.7 Duplicate the Wait2 node
- 6.8 Added CalculatorCheck decorator to Wait2 node
- 6.9 CalculatorCheck settings
- 6.10 Final confirmation
- 7 End
- 8 Next Step
What is Behaviour Tree
A behaviour tree is a tree-structured graph that focuses on the priority of behaviors to be executed.
It has a function to execute child nodes in order of priority from the root and branch depending on whether the execution of the child node succeeded or failed.
There are composite nodes that control the execution order of child nodes, and action nodes that are located at the end of nodes and perform actions.
I think it’s hard to imagine with just this sentence, so let’s practice the following this time.
- Preparing to use behaviour trees
- Execute action
- Execute nodes in order by Sequencer
- Select execution of child nodes by Selector
Preparing the tutorial project
Let’s prepare a project to practice this tutorial.
Operating environment
This tutorial is created in the following environment.
| Unity | 2019.4.40f1 |
| Arbor | 3.9.0 |
Preparing the Arbor3
If you haven’t already, you’ll need to purchase it from the Asset Store.
If you want to purchase, you can open the product page of the asset from the link below.
Create tutorial project
Create a project for the tutorial.
| Project Name | Arbor_BT_Basic |
| Template | 3D |
| Assets to import | Arbor 3: FSM & BT Graph Editor |
For information on creating projects and importing Arbor, please refer to “Preparation for using Arbor”.
Preparing to use behaviour trees
To use a behaviour tree, you need to add a BehaviourTree component to your GameObject.
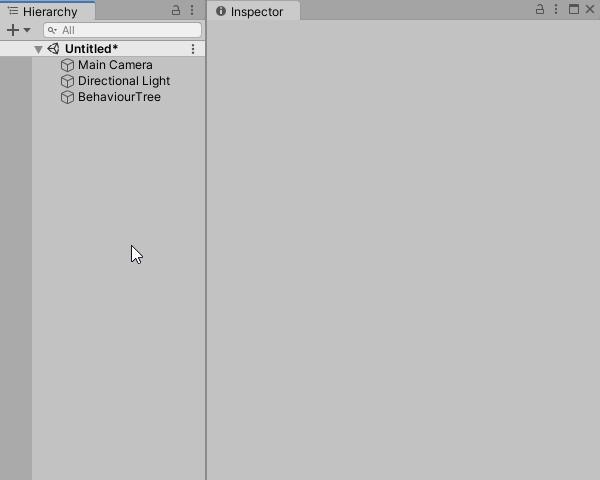
Create a GameObject with a BehaviourTree component
Create a GameObject with a BehaviourTree component
- Click the + button in Hierarchy.
- Select “Arbor > BehaviourTree” from the menu.

Open the BehaviourTree component in ArborEditor
Edit the graph of the BehaviourTree component in the Arbor Editor window.
- Select the BehaviourTree object created from Hierarchy.
- Click the “Open Editor” button in the BehaviourTree component of the Inspector window.
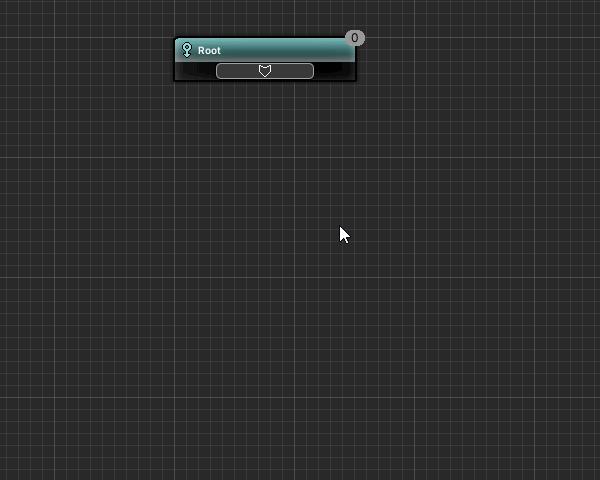
About the root node
If you look at the behaviour tree that was just created, a root node named Root was created from scratch.
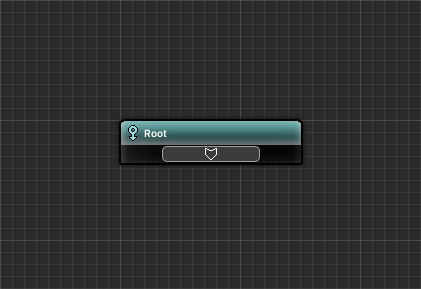
The root node is the first node executed and can only have one child node.
When the root node is executed, it immediately executes the connected child nodes and waits for the result.
Execute action
Let’s create an action node that waits for a certain amount of time as a child node of the root node.
Use the Wait action to wait for a certain amount of time.
About action nodes
Action nodes are the terminal nodes in the behaviour tree and are responsible for executing behaviors.
For example, movement and attacks of NPCs will be combined with action nodes.
Action processing is done in ActionBehaviour.
About ActionBehaviour
ActionBehaviour is a C# script attached to an action node that implements the processing of the behavior.
One ActionBehaviour is linked to an action node, and when the action node is executed, the process implemented in the linked ActionBehaviour is performed.
About Wait
After the specified number of seconds has passed, the execution result is notified to the parent node (Root node in this case) as success.
See Wait for details.
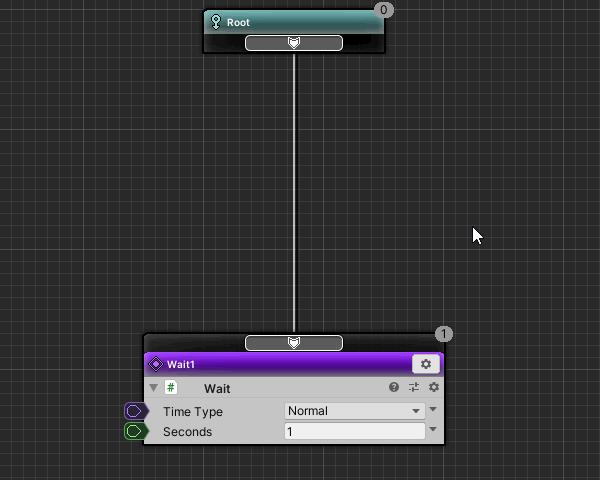
Create a Wait action node
- Drag the slot at the bottom of the Root node.
- Drop below the root node.
- Select “Create Action” from the displayed menu.
- Select “Wait” from the action selection window.
- Change the name to “Wait1” and confirm with the Enter key.
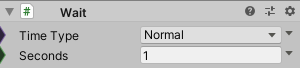
Wait action settings
This time, we will wait for 1 second.
Set Wait as follows.
| Seconds | 1 |
Let’s check how it works
Let’s play once and check the operation.
When played, the Root node and Wait actions will turn orange to indicate they are running.
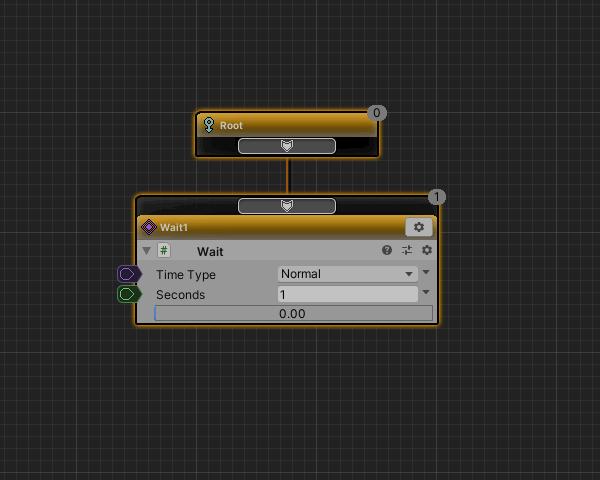
The Wait action will be executed again after 1 second has passed with the Wait action.
What happens when the root node completes
The Wait action runs repeatedly because the BehaviourTree component’s “Restart On Finish” default value is on.
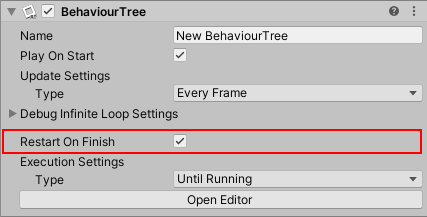
If “Restart On Finish” is on, it will restart after the Root node has finished executing.
Try turning off “Restart On Finish” while playing.
- Start playing
- Select the BehaviourTree object from Hierarchy.
- Turn off “Restart On Finish” in the Inspector window.
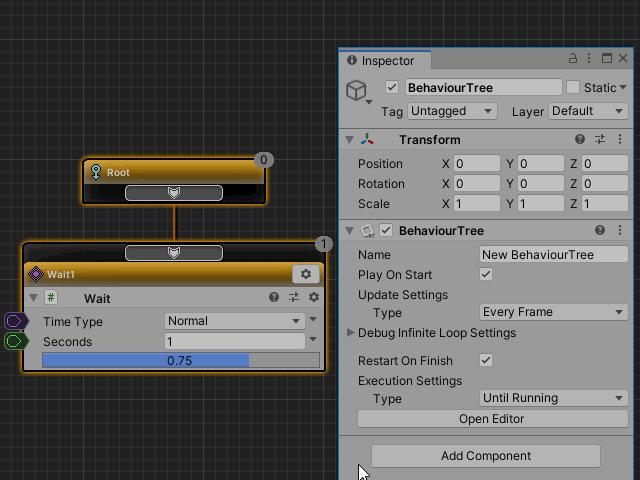
The graph stops playing when the Wait action completes after turning off “Restart On Finish”.
In this way, “Restart On Finish” determines whether the graph is repeatedly executed.
This time, I turned it off while playing as a trial, so it will return to the original when I finish playing.
Execute nodes in order by Sequencer
So far, we have confirmed that the action connected to the root node is executed.
However, it is not possible to do more complicated processing with only one action node.
Therefore, by inserting a composite node between the root node and the action node, more complex execution control can be performed.
Now let’s use the Sequencer Composite to run multiple action nodes in sequence.
About composite nodes
A composite node is a node embedded between a root node and an action node, responsible for controlling the execution of child nodes.
For example, control NPCs to perform actions to approach the player, and to perform actions to attack when they come close.
CompositeBehaviour controls the execution order of child nodes.
About CompositeBehaviour
A CompositeBehaviour is a script attached to a Composite node.
One CompositeBehaviour is attached to a Composite node, and when the Composite node is executed, the attached CompositeBehaviour controls the execution order of child nodes.
About the Sequencer Composite
A Sequencer is a type of composite that controls the execution order of child nodes.
Executes the leftmost node first among the possible multiple child nodes.
If the execution result of the child node is successful, execute the node next to the right, and then execute to the right each time it succeeds.
If the result of executing up to the rightmost child node is all success, it will also return success to the parent node.
If the executed child node fails, it will also return failure to the parent node without executing the next child node on the right.
A Sequencer can be used when you want to execute child nodes in order from left to right and all succeed.
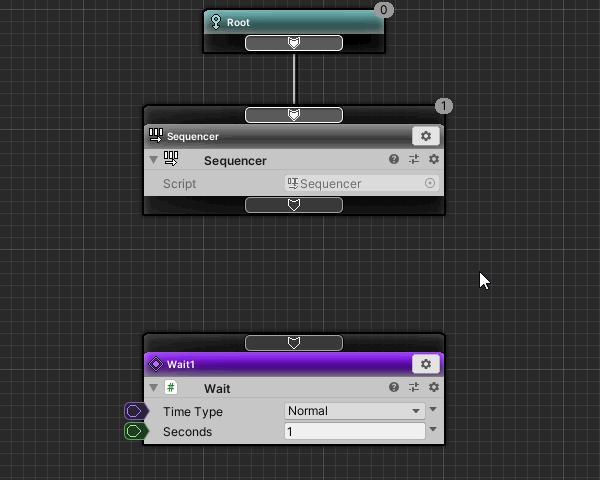
Move Wait1 node
The existing Wait1 node will be used later, so let’s move it out of the way.
- Drag the node header of the Wait1 node and move it down.

Create a Sequencer Composite Node
Create a Sequencer composite on the child nodes of the Root node.
- Drag the slot at the bottom of the Root node.
- Drop below the root node.
- Select “Create Composite” from the menu.
- Select “Sequencer” from the composite selection window.
- Leave the name as is and press Enter to confirm.
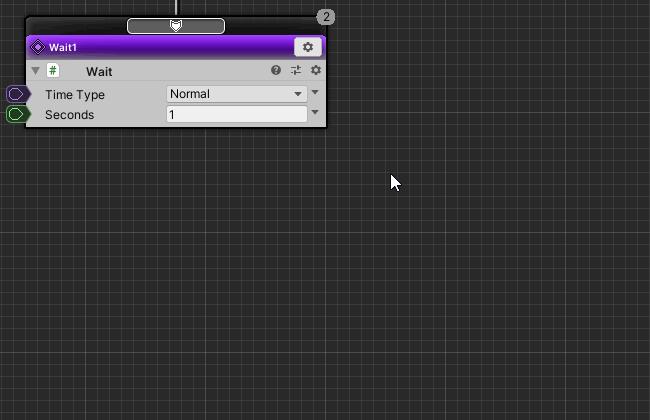
Connect the Wait1 node to a child of the Sequencer node
Reconnect the original Wait node as a child node of the Sequencer node.
- Drag the slot at the bottom of the Sequencer node.
- Drop into the slot above the Wait1 node.
Duplicate Wait1 node
If there is only one Wait action, there is not much difference in operation, so let’s add another Wait action.
- Click the settings icon for the Wait1 node.
- Select “Duplicate” from the menu.
- Double-click the name part of the newly added Wait node.
- Change the name to “Wait2” and confirm with the Enter key.
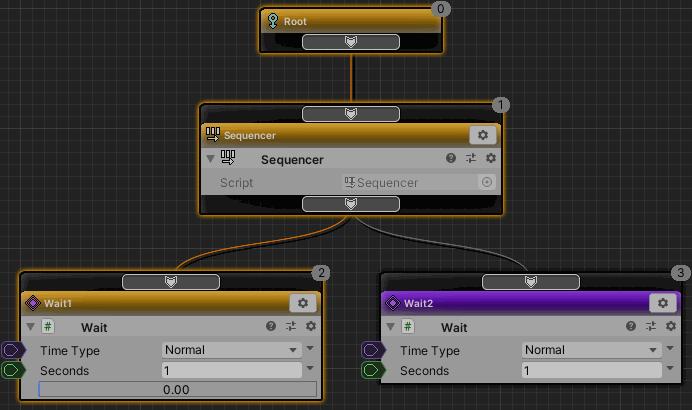
Now we have two Wait nodes in the Sequencer child node.
About node priority
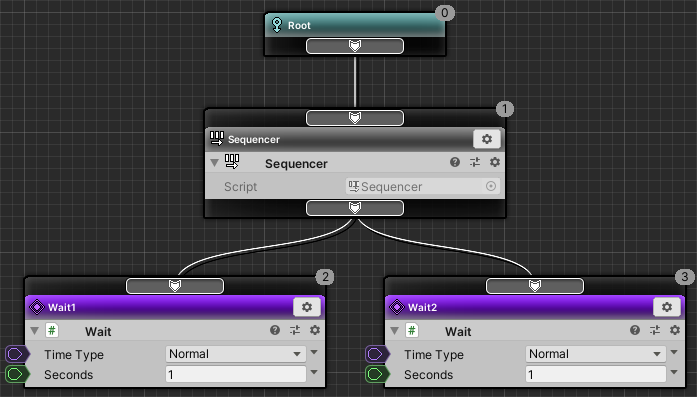
Nodes are prioritized from the Root node downwards and from left to right.
As a general rule, the lower the priority, the earlier it will be executed, and the higher the priority, the later it will be executed.
The priority of each node is displayed as a number on the top right of the node.
In this example it looks like this:
- 0 : Root
- 1 : Sequencer
- 2: Wait1
- 3: Wait2
The Sequencer executes the child nodes from left to right, so the Wait1 node with priority 2 executes first, followed by the Wait2 node with priority 3.
Check play
Let’s check the play here.
You can see that the Wait1 node with priority 2 runs first, followed by the Wait2 node with priority 3.
Since “Restart On Finish” is on, the two Wait nodes continue to execute alternately.
Select execution of child nodes by Selector
Depending on the execution result of the child node, you can choose whether to execute the next priority node.
The decorator determines whether an individual node can be executed or not.
Let’s use the Selector composite and the CalculatorCheck decorator to select which node to run.
About Selector
A Selector is a type of composite that controls the execution order of child nodes.
Executes the leftmost node first among the possible multiple child nodes.
If the execution result of the child node is a failure, execute the node next to the right, and then execute toward the right each time it fails.
If the result of execution up to the rightmost child node fails, it will also return failure to the parent node.
If the executed child node succeeds, it also returns success to the parent node without executing the next child node on the right.
Selectors can be used when you want only one of the child nodes to execute successfully.
About decorators
Decorators are scripts that add additional functionality to composite and action nodes.
Decorators have many functions, but here we use them to determine if a node is executable.
When the node is executed, conditional judgment is performed on all decorators and the node is executed if the result is true.
If the condition judgment result is false, it is determined that the node cannot be executed and failure is returned to the parent node.
It’s up to the decorator to decide which node to run.
For example, if the judgment result is true when the distance to the player is closer than the set value, you can create a node that executes only when the distance to the player is close.
About the CalculatorCheck decorator
CalculatorCheck is a decorator that determines whether the node can be executed by judging the result of the operation node.
If you perform the calculations necessary for the judgment in the operation node and use CalculatorCheck for the result judgment, you can make a somewhat complicated condition judgment without creating a decorator script.
See CalculatorCheck for details.
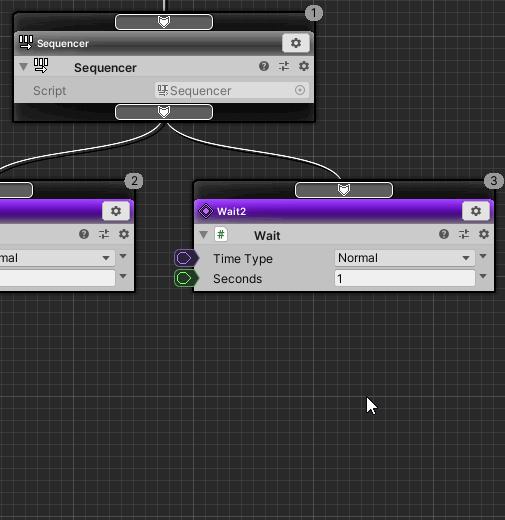
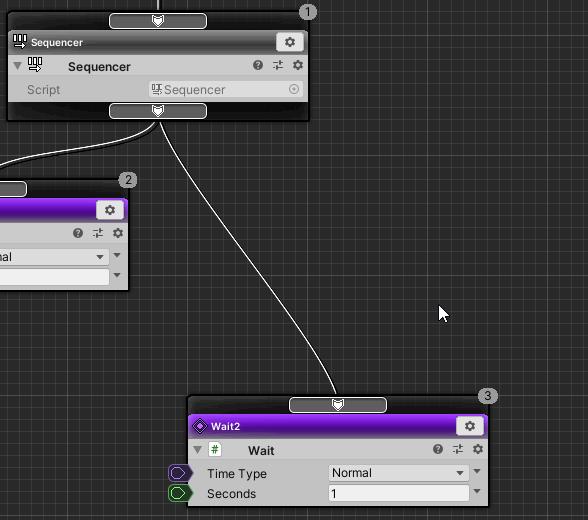
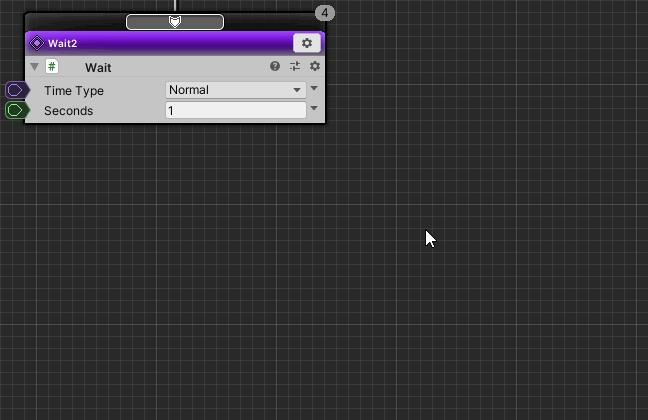
Move the Wait2 node
I would like to add a Selector node between the Sequencer and Wait2 nodes.
First, move the Wait2 node out of the way.
- Drag the header of the Wait2 node and move it down.
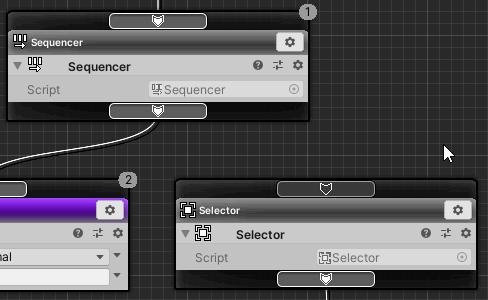
Create Selector Composite Node
- Drag the slot above the Wait2 node
- Drop near between Sequencer node and Wait2 node
- Select “Create Composite” from the menu.
- Select “Selector” from the composite selection window.
- Leave the name as is and press Enter to confirm.
- Adjust the position as appropriate if the nodes overlap.
Connect Sequencer node and Selector node
- Drag the slot at the bottom of the Sequencer node
- Drop it into the slot above the Selector node
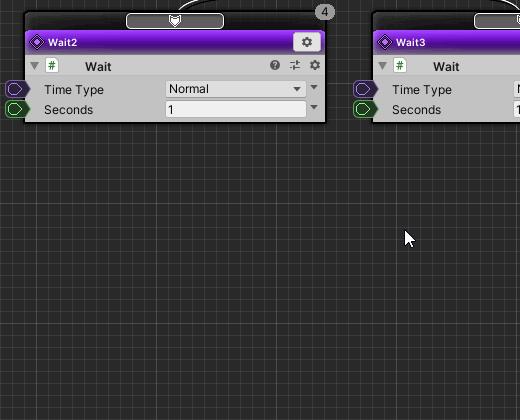
Duplicate the Wait2 node
Let’s add another Wait action so that the two actions are also executed on the Selector’s child nodes.
- Click the Settings button for the Wait2 node.
- Select “Duplicate” from the menu.
- Double-click the name part of the newly added Wait node.
- Change the name to “Wait3” and confirm with the Enter key.
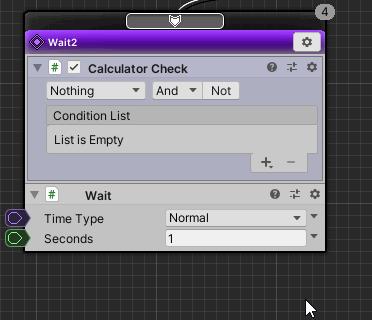
Added CalculatorCheck decorator to Wait2 node
- Click the Settings button for the Wait2 node.
- Select “Add Decorator” from the menu.
- Select “CalculatorCheck” from the decorator selection window.
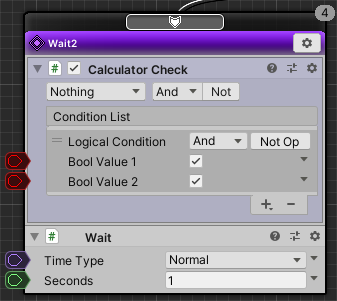
CalculatorCheck settings
As mentioned above, for a simple operation check in the tutorial, check the operation by directly clicking the bool value check box without using the operation node.
- Click the + button in Condition List.
- Select “Bool” from the menu.
- Turn on the check for Bool Value 1.
Final confirmation
Finally, let’s start playing again and check the operation.
First, if you confirm without doing anything, the Wait1 and Wait2 actions are executed alternately.
This behavior is as follows
- Root node is executed first.
Root node forces execution of only one child node. - A Sequencer node is executed.
The Sequencer node executes child nodes in order from the leftmost. - Wait1 node is executed.
Returns success to the parent node after the 1 second set in Seconds has passed. - Since the result of the Wait1 node was successful, the Sequencer node executes the next node on the right.
- Selector node is executed.
Selector nodes are executed in order from the leftmost child node. - CalculatorCheck of the Wait2 node determines the execution condition.
Execute the action of the Wait2 node because the Bool values match. - Wait2 node is executed.
Returns success to the parent node after the 1 second set in Seconds has passed. - Since the result of the Wait2 node was successful, the Selector node does not execute any more child nodes and returns success to the parent node.
- The Sequencer node returns success to the parent node because the result of the Selector node was success and it was the rightmost node.
- Since the execution of the child node is completed, the Root node is temporarily terminated.
Restart On Finish is on, so try again.
Let’s uncheck Bool Value 1 in Calculator Check while playing.
Wait1 node and Wait3 node are changed to run alternately.
This behavior is as follows
- From the Root node to the execution of the Selector node are as described above.
- CalculatorCheck of the Wait2 node determines the execution condition.
Since the Boolean values do not match, the action of the Wait2 node is not executed and returned as failure. - Since the result of the Wait2 node was a failure, the Selector node executes the node on the right.
- Wait3 node is executed.
Returns success to the parent node after the 1 second set in Seconds has passed. - Since the result of the Wait3 node was successful, the Selector node does not execute any more child nodes and returns success to the parent node.
- The Sequencer node returns success to the parent node because the result of the Selector node was success and it was the rightmost node.
- Since the execution of the child node is completed, the Root node is temporarily terminated.
Restart On Finish is on, so try again.
End
This completes the Arbor Tutorial “Behaviour tree basics”.
Tweet completion of the Arbor tutorial “Behaviour tree basics”
Next Step
I touched on AbortFlags a little in the supplement, but by making full use of this flag, you will be able to set up more flexible behavior.
Let’s check what happens when this AbortFlags is set in the next section, “Aborts and Interrupts with Decorators“.