

This time, I will explain how to make an automatic door with a sensor.
The MonoBehaviour script manages the entry and exit of the sensor, and the created sensor script is referenced from the StateBehaviour to make a transition.
In this tutorial, you will learn how to work with ArborFSM and how to create practical scripts with sensor-like scripts that are referenced across state boundaries.
Contents
- 1 Operating environment
- 2 Preparation of tutorial project
- 3 Overview
- 4 Creating a sensor
- 5 Creating a transition script with a sensor
- 6 Creating an automatic door state machine
- 7 Improvement of automatic door
- 8 Final confirmation
- 9 Challenge
Operating environment
This tutorial is created in the following environment.
| Unity | 2019.4.40f1 |
| Arbor | 3.9.0 |
If you use a different version, please read as appropriate because there may be some differences from the explanation.
Preparation of tutorial project
Create project
Create a project for the tutorial.
| Project Name | ArborTutorial06 |
| Templete | 3D |
| Assets to import | Arbor 3: FSM & BT Graph Editor |
For information on creating projects and importing Arbor, please refer to “Preparation for using Arbor”.
Import tutorial package
This time, we prepared a package in which the stages were arranged in advance.
This package refers to the sample included with Arbor, so be sure to import Arbor first.
“Tutorial06” をダウンロード
Tutorial06.unitypackage – 1905 回のダウンロード – 4.58 KBFor details on how to import asset packages, see the Unity official manual “Importing local asset packages“.
If the package is corrupted
Previously, some browsers could corrupt the package file when downloaded.
If the package import fails, try downloading it in another browser.
Open the tutorial scene
Open the prepared Auto Door scene.
- Double-click “Assets/AutoDoor/AutoDoor.unity” from the Project window.
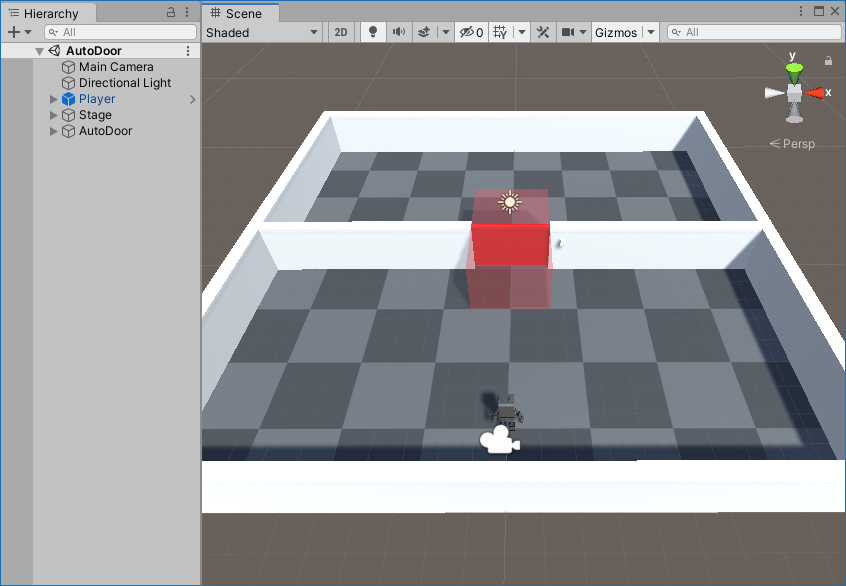
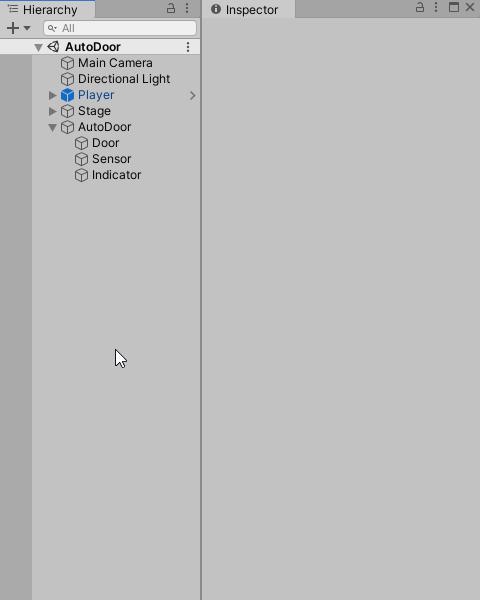
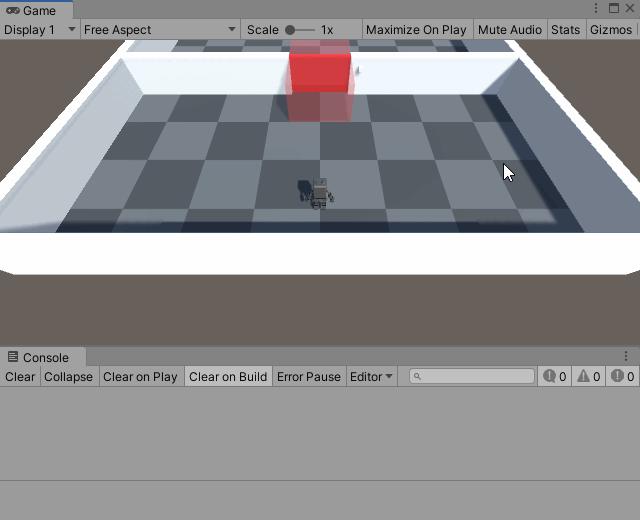
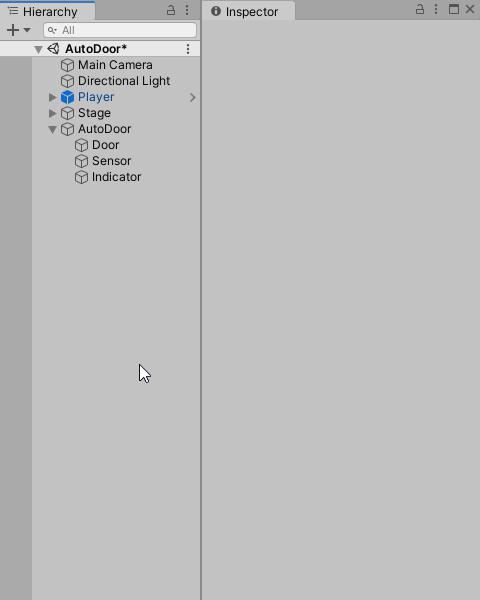
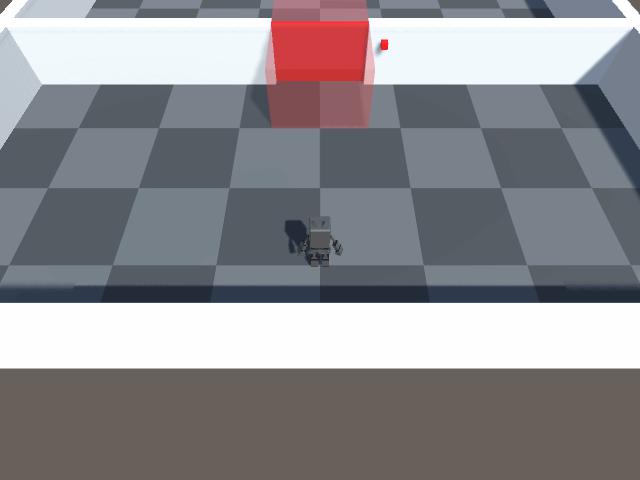
Explanation of the current state of the scene
- Main Camera
It is a camera that tracks the Player.
I am using Follow Camera, which is a sample included with Arbor. - Directional Light
Illuminates the whole. - Player
It is a player character.
Move with WASD or direction key, and run by moving while holding down the left shift key.
I am using the Player prefab from the sample included with Arbor. - Stage
It’s a stage. The floor and walls are arranged. - AutoDoor
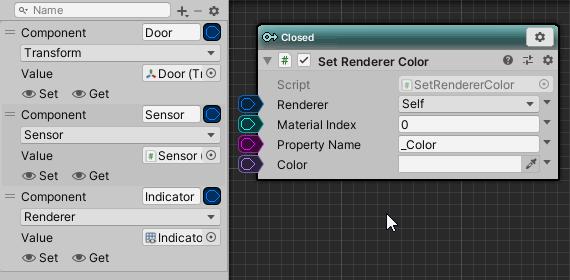
It is an automatic door. We will implement the operation in this tutorial.- Door
It is the door body.
It doesn’t work yet. - Sensor
It is an area that senses whether or not a player is in.
I haven’t detected it yet. - Indicator
An object that visualizes the state of automatic doors.
It hasn’t changed yet.
- Door
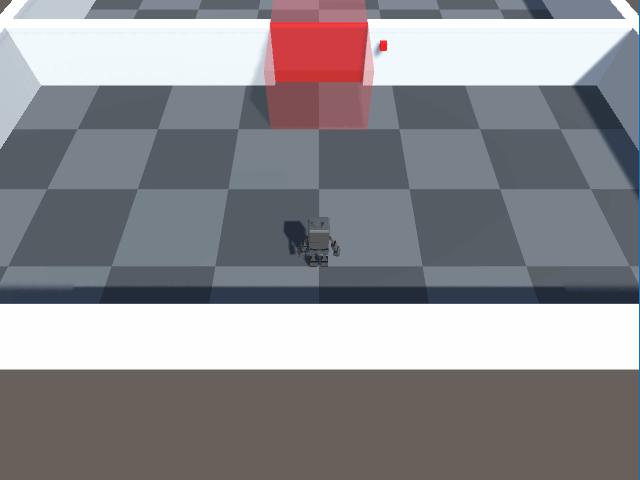
Even if you play as it is and move the player character into the Sensor, the door will not open.
Overview
This time, I will explain from the outline of how to create an automatic door.
Sensor
- Create a Sensor script that inherits MonoBehaviour
- Manage the number of objects in BoxCollider with OnTriggerEnter / OnTriggerExit
- Added Sensor script to Sensor object.
AutoDoor
The operation of the door is divided into states as follows.
Closed state
- The state where the door is closed.
- When someone enters the Sensor, it transitions to the Opening state.
- Indicator lights up in red.
Opening state
- A state in which the Door is moved and opened.
- When it is fully opened, it transitions to the Opened state.
- Indicator lights up in magenta.
Opened state
- The state where the Door is open.
- If there is no one in the Sensor, it transitions to the Closing state.
- Indicator lights up in green.
Closing state
- A state in which the Door is moved and closed.
- When it is completely closed, it transitions to the Closed state.
- Indicator lights up in orange.
Now let’s create an automatic door.
Creating a sensor
We will create a script to store the characters contained in BoxCollider using the trigger function of Unity.
This time, we will create a class that inherits MonoBehaviour without using the Arbor function.
Creating a script file
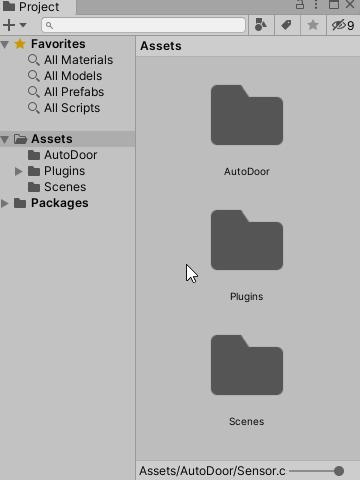
- Select the AutoDoor folder in the Project window.
- Click the + button and select “C# Script” from the menu.
- Confirm the name as “Sensor”.
- When you select from the menu, the name input mode is automatically set.
Enter the name in that state and confirm. - If you decide once with the default name, or if you change the name by mistake later, you need to change the class name as well.
If you don’t know where to fix the code, delete the script and recreate it.
- When you select from the menu, the name input mode is automatically set.
Coding
- Double-click the Sensor script you created to open the code editor.
- Fill in the code below.
Sensor settings
Set the Sensor object.
- Select “AutoDoor/Sensor Object” from Hierarchy.
- Click the Add Component button.
- Select “ArborTutorial06 > Sensor” from the component selection window.
If you play at this stage and move the player in and out of the sensor, the number will be displayed in the Console.
Since the action to open the door in response to the sensor has not been done yet, there is no change when looking only at the game screen.
Creating a transition script with a sensor
Create a StateBehaviour script that transitions by referring to the enteredCount of the Sensor class.
This time, I will simply make a transition depending on whether or not there is one or more in the sensor.
Creating a script file
- Select the AutoDoor folder in the Project window.
- Click the + button and select “Arbor> StateBehaviour C # Script” from the menu.
- Confirm the name as “Sensor Transition”.
- When you select from the menu, the name input mode is automatically set.
Enter the name in that state and confirm. - If you decide once with the default name, or if you change the name by mistake later, you need to change the class name as well.
If you don’t know where to fix the code, delete the script and recreate it.
- When you select from the menu, the name input mode is automatically set.
Coding
- Double-click the created SensorTransition script to open it in the code editor.
- Fill in the code below.
Code supplement
About FlexibleComponent
- A class that can flexibly handle references to components.
- By using such a Flexible ** class, you can flexibly handle data flow and input from parameters in addition to direct specification.
- The SlotType attribute is a special attribute for specifying the type to be referenced by the FlexibleComponent type.
- Also, since Unity 2020, generic type serialization is possible, so FlexibleComponent<Sensor> can also be used directly for the field without using the SlotType attribute.
Creating an automatic door state machine
Add ArborFSM component
Add a component for the state machine to AutoDoor.
- Select an AutoDoor object from Hierarchy.
- Click the Add Component button in the Inspector.
- Select “Arbor > Arbor FSM” from the component selection window.
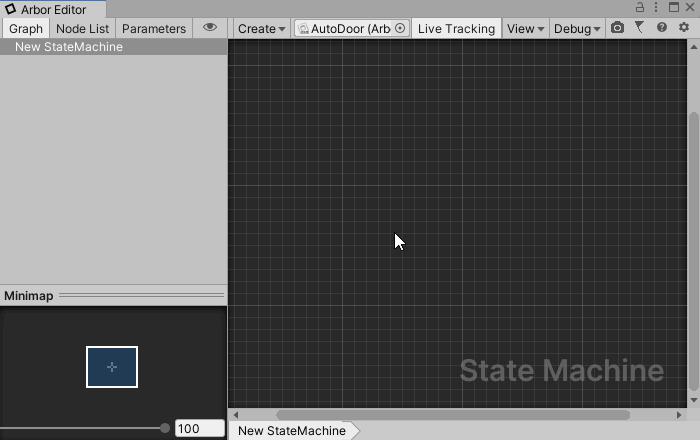
- Click the Open Editor button of the added Arbor FSM to open the Arbor Editor window.
Creating parameters
If you want to use the same value in multiple states, it is convenient to set the parameter so that you can change it later.
This time, create the parameters for the component.
Creating a Parameter Container linked to a graph
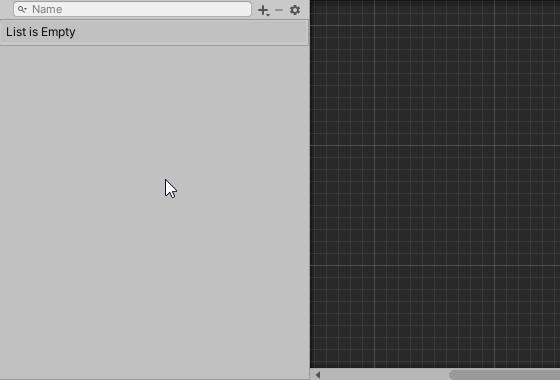
- Select the parameter tab on the side panel.
- Click the “Create” button.
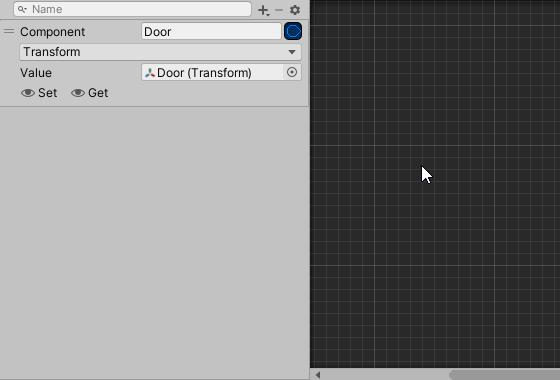
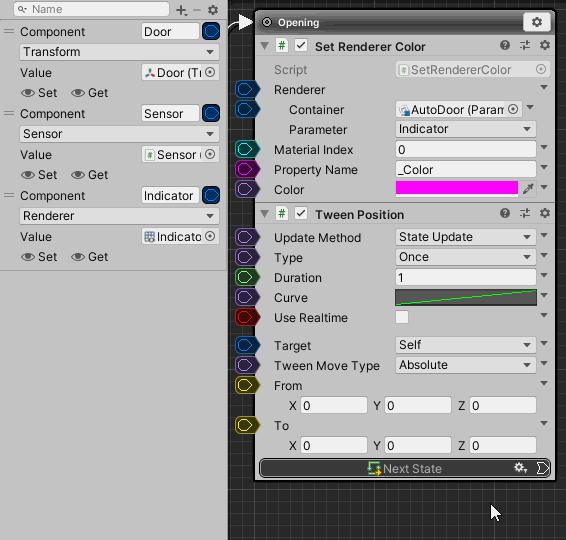
Door parameter
Create a parameter that references the Transform component of the Door object.
- Click the + button on the parameters tab.
- Select “Unity Object > Component” from the parameter type selection window.
- Set the name to “Door”.
- Click the type dropdown.
- Select “Unity Engine > Transform” from the type selection window.
- Set Value to “Door object”.
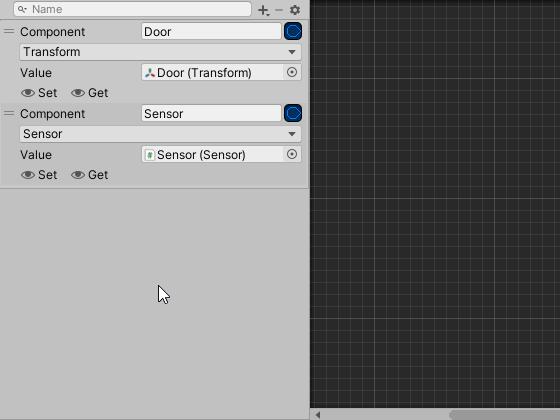
Sensor parameter
Create a parameter that references the Sensor component of the Sensor object.
- Click the + button on the parameters tab.
- Select “Unity Object > Component” from the parameter type selection window.
- Set the name to “Sensor”.
- Click the type dropdown.
- Select “ArborTutorial06 > Sensor” from the type selection window.
- Set Value to “Sensor object”.
Indicator parameter
Create a parameter that references the Renderer component of the Indicatorobject.
- Click the + button on the parameters tab.
- Select “Unity Object > Component” from the parameter type selection window.
- Set the name to “Indicator”.
- Click the type dropdown.
- Select “UnityEngine > Renderer” from the type selection window.
- Set Value to “Indicator object”.
Closed state
The Closed state is the state in which the door is completely closed.
Indicator is red. If anyone is inside the Sensor, it will transition to the open operation.
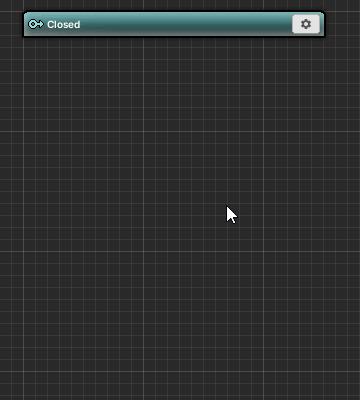
Creating a Closed state
Create a Closed state.
- Right-click on the graph.
- Select “Create State” from the menu.
- Set the name to “Closed” and confirm.
Add SetRendererColor
Change the color of the Indicator.
This time, we will use SetRendererColor to change the color.
See SetRendererColor for details.
Add SetRendererColor to the Closed state.
This time, let’s add it from the “Insert Behaviour” button instead of the state setting menu.
- Move the mouse cursor to the bottom center of the Closed state.
- Click the displayed “Insert Behaviour” button.
- Select “Add Behaviour” from the menu.
- Select “Renderer > SetRendererColor” from the behavior selection window.
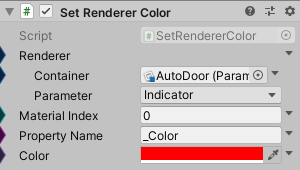
SetRendererColor settings
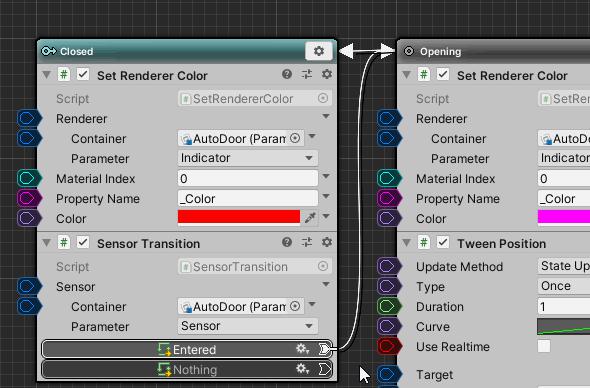
Set SetRendererColor as follows.
| Renderer | Indicator parameter
|
| Color | Red(FF0000) |
Add SensorTransition
Use the SensorTransition created earlier for the judgment in the Sensor.
Add SensorTransition to the Closed state.
- Move the mouse cursor to the bottom center of the Closed state.
- Click the displayed “Insert Behaviour” button.
- Select “Add Behaviour” from the menu.
- Select “ArborTutorial06 > Sensor Transition” from the behavior selection window.
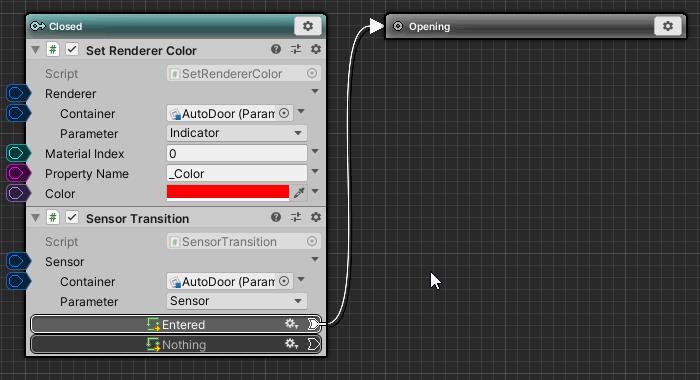
SensorTransition settings
Set the Sensor Transition as follows.
| Sensor | Sensor parameter
|
| Entered | Create an Opening state and connect
|

The Closed state looks like this.
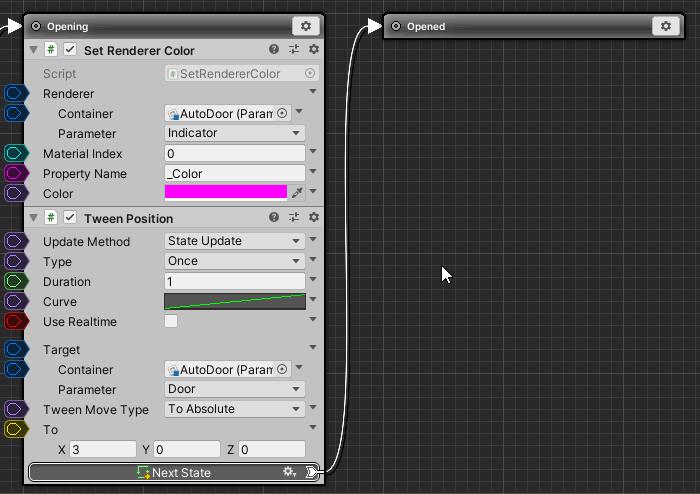
Opening state
The Opening state is a state in which the door is gradually opened.
Indicator is magenta. Open the Door gradually, and when it is fully opened, it will transition.
Copy and paste of SetRendererColor
Copy and paste SetRendererColor from the Closed state to set the Indicator color in the Opening state.
This time, let’s duplicate it by dragging and dropping the title bar of the behavior.
- Drag the title bar of SetRendererColor in the Closed state.
- Hold down (Windows) Ctrl / (Mac) command and drop into the Opening state.
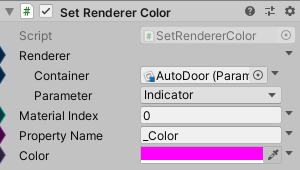
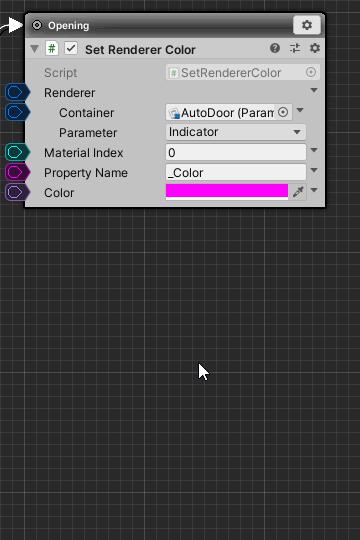
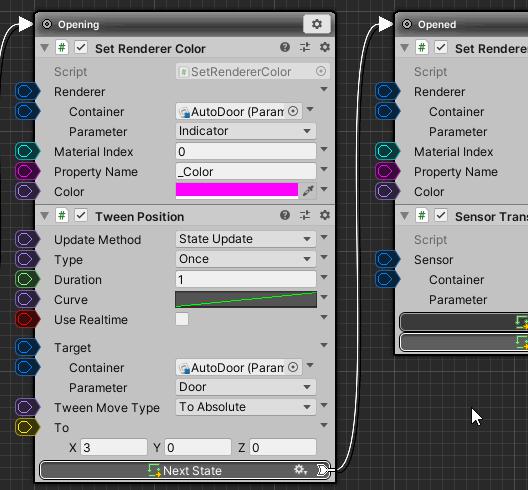
SetRendererColor settings
Set SetRendererColor as follows.
| Color | Magenta(FF00FF) |
Add TweenPosition
Use TweenPosition for the opening operation.
See TweenPosition for details.
Add TweenPosition to the Opening state.
- Move the mouse cursor to the bottom center of the Opening state.
- Click the displayed “Insert Behaviour” button.
- Select “Add Behaviour” from the menu.
- Select “Tween > Tween Position” from the behavior selection window.
TweenPosition settings
Set TweenPosition as follows.
| Target | Door parameter
|
| TweenMoveType | To Absolute |
| To | 3, 0, 0 |
| Next State | Create an Opened state and connect.
|
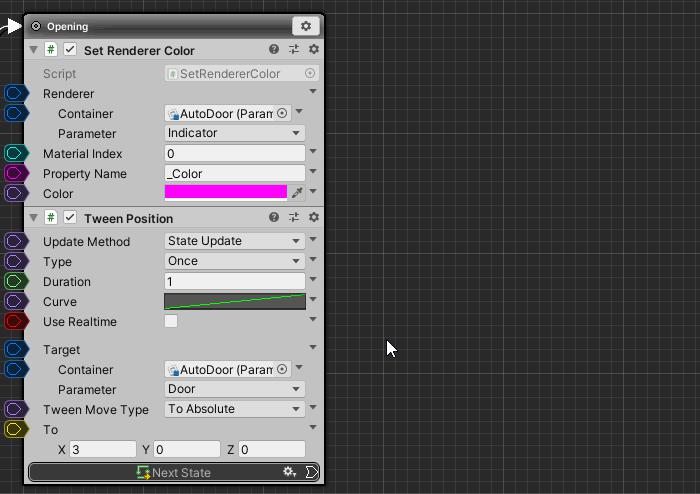
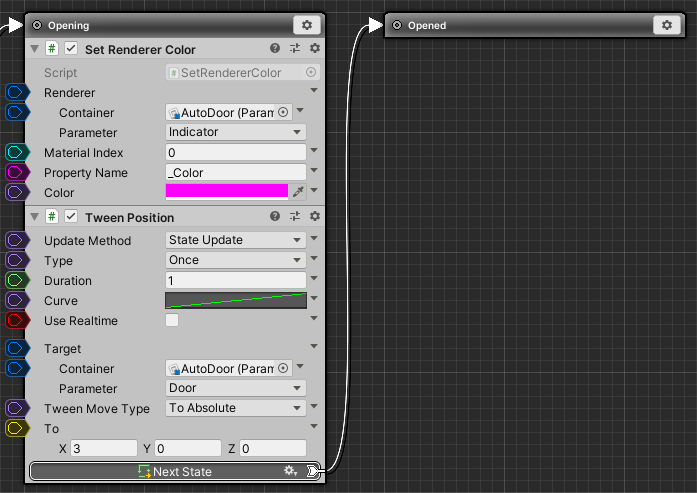
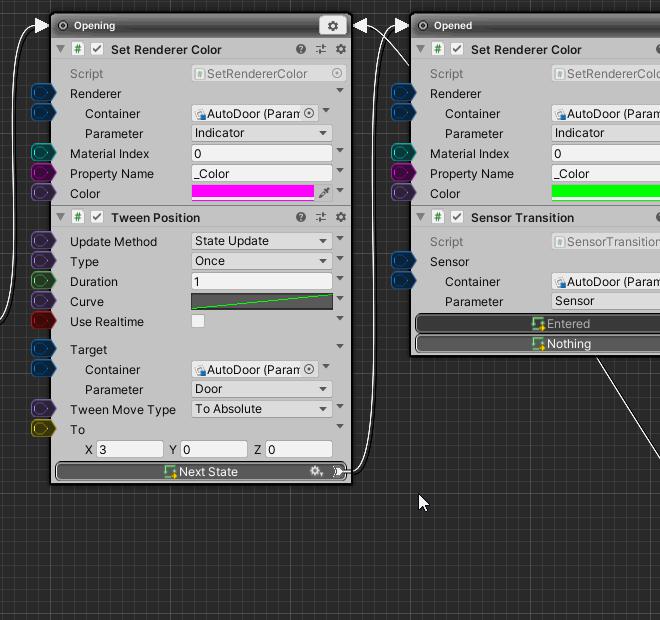
The Opening state looks like this.
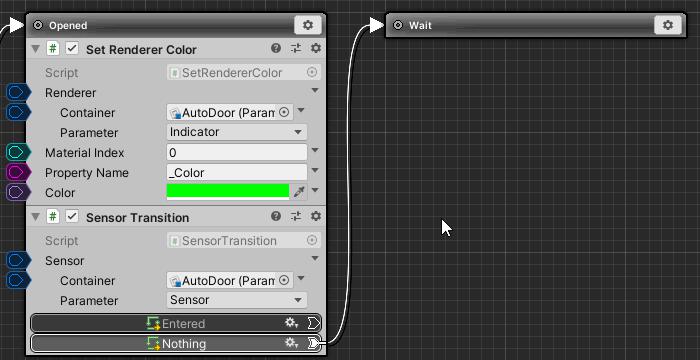
Opened state
The Opend state is the state in which the door is fully open.
Indicator is green. When there is no one in the Sensor, it will transition to the closing operation.
Copy and paste of SetRendererColor
Copy and paste SetRendererColor from the Opening state to set the indicator color.
- Drag the title bar of SetRendererColor in the Opening state.
- Hold down (Windows) Ctrl / (Mac) command and drop to Opened state.
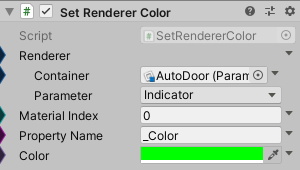
SetRendererColor settings
Set SetRendererColor as follows.
| Color | Green(00FF00) |
Copy and paste of SensorTransition
Copy and paste the SensorTransition from the Closed state for judgment in the Sensor.
There is some distance between the states here, so instead of copying by dragging, copy from the menu and paste with the “Insert Behaviour” button.
- Click the SensorTransition settings icon in the Closed state.
- Select “Copy” from the menu.
- Move the mouse cursor to the bottom center of the Opened state.
- Click the displayed “Insert Behaviour” button.
- Select “Paste Behaviour” from the menu.
SensorTransition settings
Set SensorTransition as follows.
| Entered | Disconnect
|
| Nothing | Create a Closing state and connect.
|
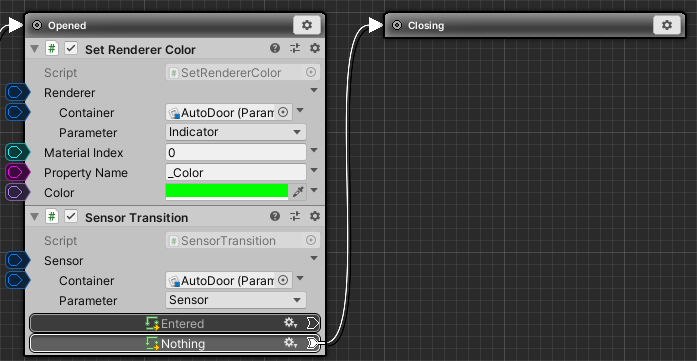
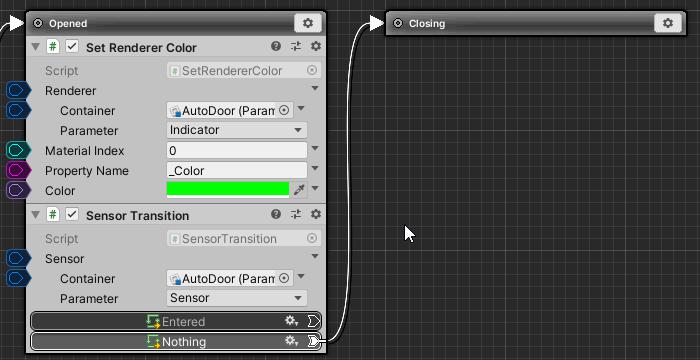
The Opened state looks like this.
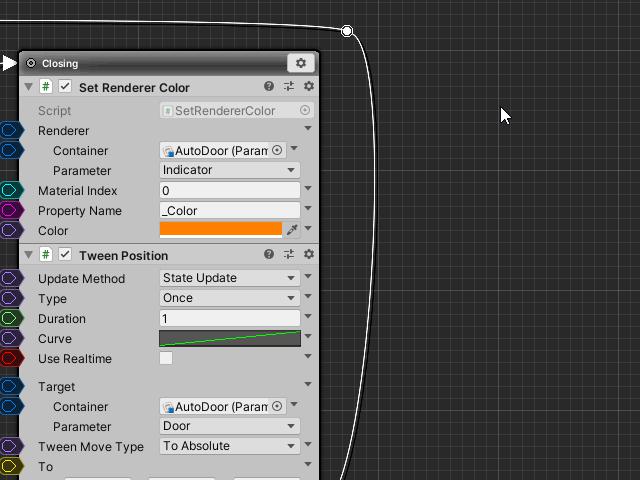
Closing state
The Closing state is a state in which the door is gradually closed.
Indicator is orange. The Door is gradually closed, and when it is completely closed, it transitions to the Closed state.
Copy and paste of SetRendererColor
Copy and paste SetRendererColor from the Opened state to set the indicator color.
- Drag the title bar of SetRendererColor in the Opened state.
- Hold down (Windows) Ctrl / (Mac) command and drop into Closing state.
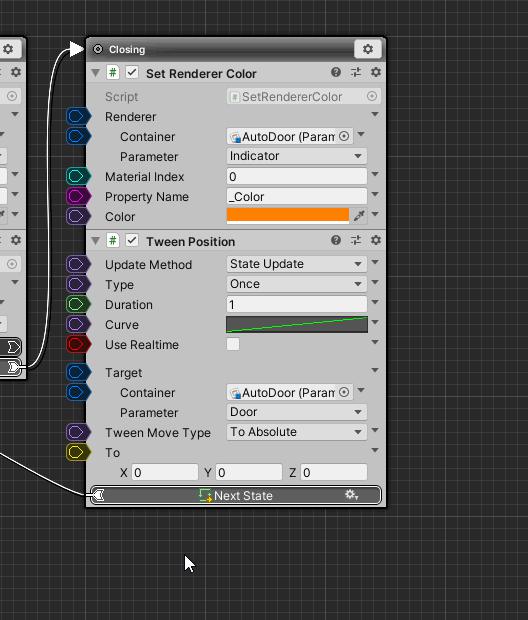
SetRendererColor settings
Set SetRendererColor as follows.
| Color | Orange(FF8000) |

Copy and paste of TweenPosition
Copy and paste TweenPosition from the Opening state for the closing operation.
- Click the TweenPosition setting icon in the Opening state.
- Select “Copy” from the menu.
- Move the mouse cursor to the bottom center of the Closing state.
- Click the displayed “Insert Behaviour” button.
- Select “Paste Behaviour” from the menu.
TweenPosition settings
Set TweenPosition as follows.
| To | 0, 0, 0 |
| Next State | Connect to Closed state. |
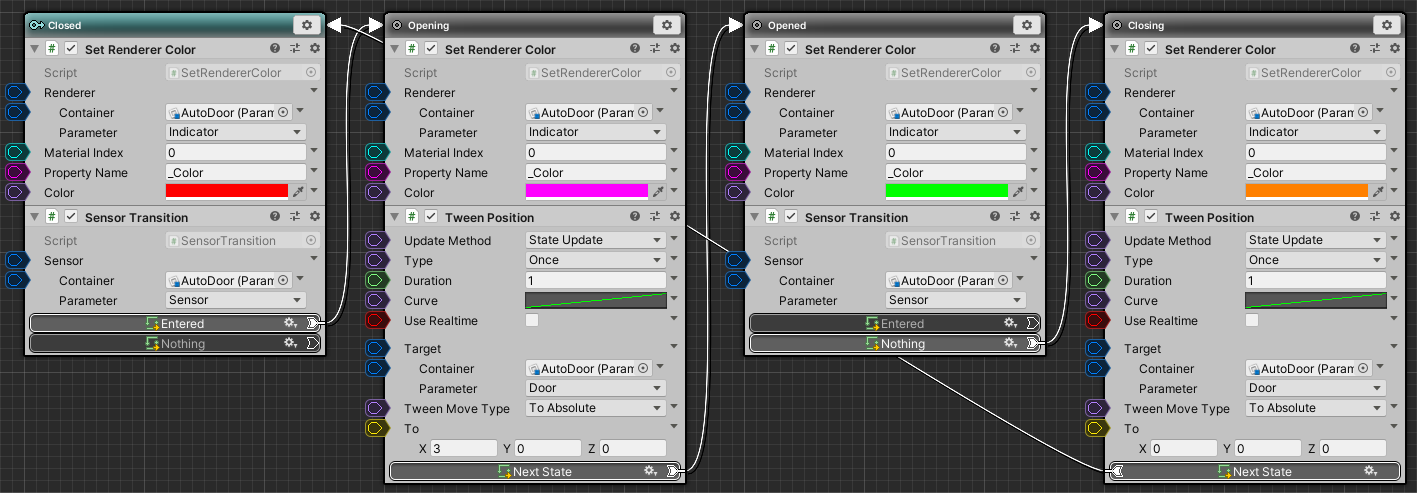
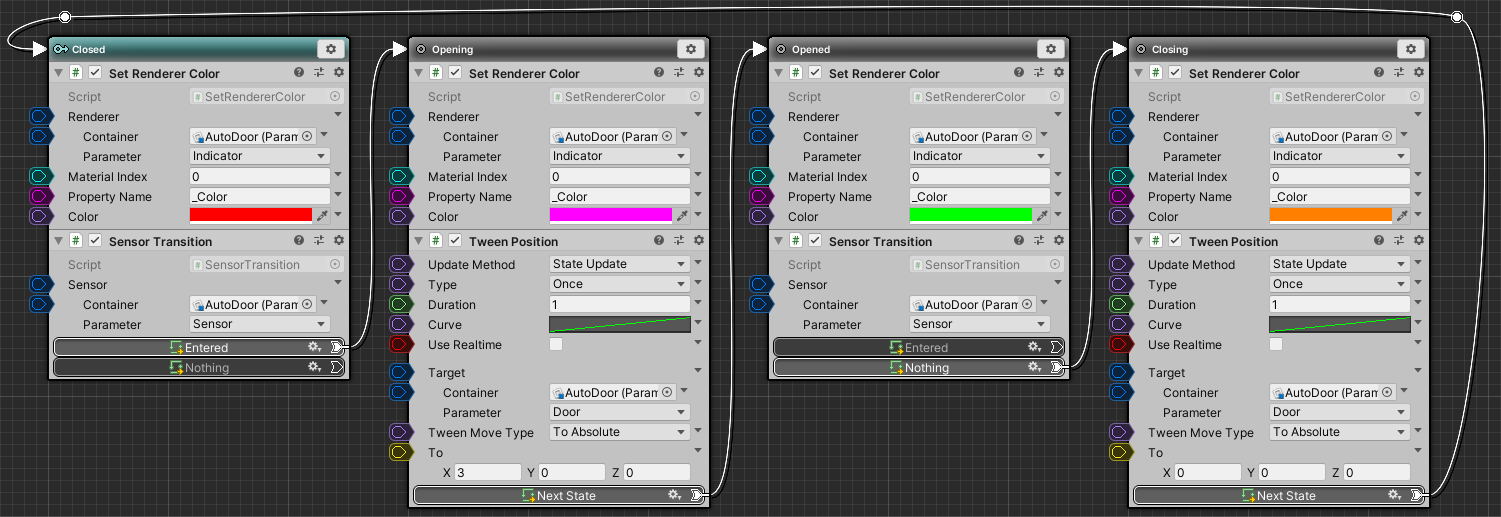
The whole graph looks like this.
Arrangement of connecting lines
The direction of the connecting line is different by only one, and the line and the node overlap and it becomes difficult to see, so let’s organize it using the reroute node.
- Right-click on the connection line near the Closing state.
- Select “Reroute” from the menu.
- Move the reroute node to the upper right edge of the Closing state.
- Right-click on the connection line near the Closed state.
- Select “Reroute” from the menu.
- Moved the reroute node to the upper left edge of the Closed state.
You now have a connecting line that exits the right side of the Closing state, bypasses the top, and enters the left side of the Closed state.
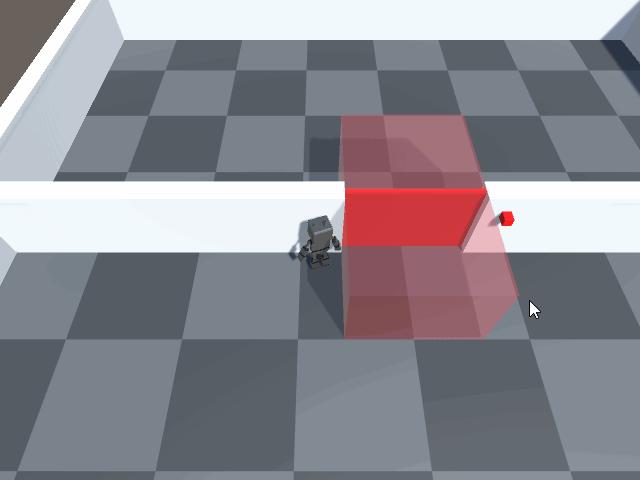
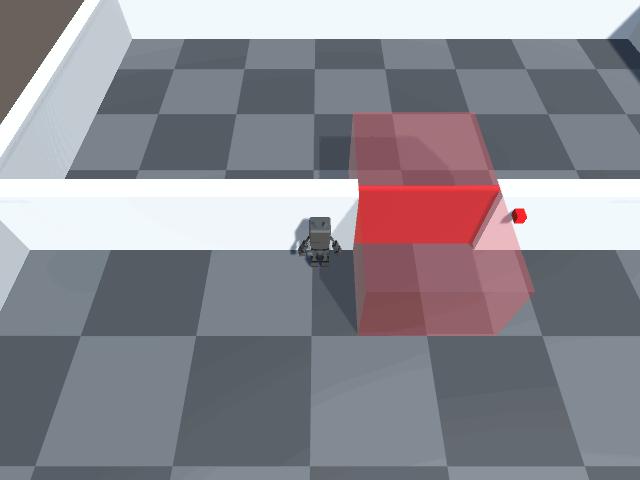
Operation check
Let’s play and check here.

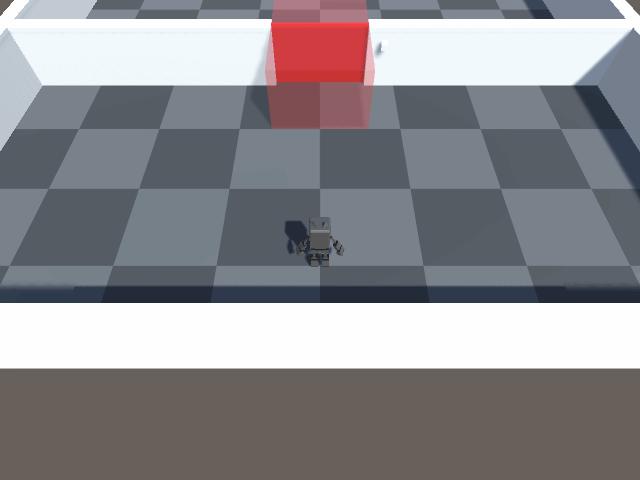
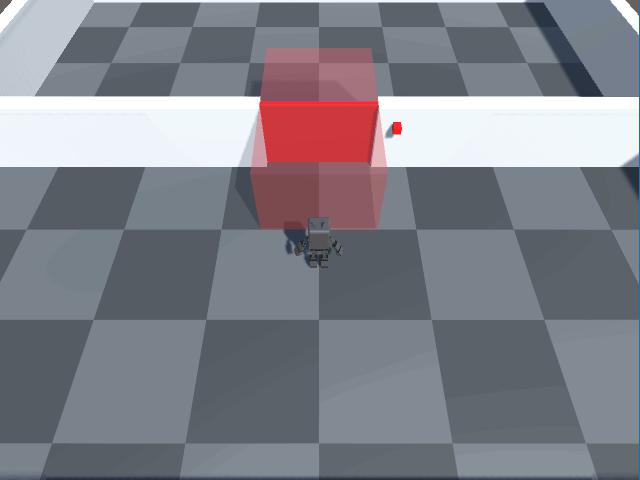
The door opens when you move to the red translucent area and closes when you exit it.
Improvement of automatic door
I’ve done the basic work, but I’m still worried about the details.
Let’s improve the operation from now on.
Improved Closing state
Once this automatic door starts to close, its operation will not switch until it is completely closed.
With this, there is a possibility that the character will be caught and you will inadvertently get stuck.
Let’s improve it so that it will be reopened if someone comes in even while it is closed.
Copy and paste of SensorTransition
Copy and paste the Sensor Transition from the Closed state.
- Click the SensorTransition setting icon in the Closedstate.
- Select “Copy” from the menu.
- Move the mouse cursor to the bottom center of the Closing state.
- Click the displayed “Insert Behaviour” button.
- Select “Paste Behaviour” from the menu.
Since the transition destination is Opening, there is no need to change the settings.
Supplementary information on reopening operation
In the TweenPosition of the Opening state, the Tween Move Type is set to “To Absolute”, so it will gradually move from the position at the start of the state to the position specified for To.
For example, if the Closing state transitions from a half-closed state to an Opening state, it will gradually move from the half-closed position to the fully open position.
However, since Duration is fixed at 1 second, the movement speed until it is fully opened will be slower than usual.
If you need constant velocity movement, I think you should change it to another behavior or create your own script.
Arrangement of connecting lines
Since the connection lines have overlapped, organize them by reroute.
- Right-click on the connection line near the Opening state.
- Select “Reroute” from the menu.
- Moved the reroute node to the lower left side of the Opening state.
You now have a connecting line that exits the left side of the Closing state, passes down, and enters the right side of the Opening state.
Operation check
Let’s play and check.
If you enter the sensor while it is closed, you can see that it switches to the reopening operation.
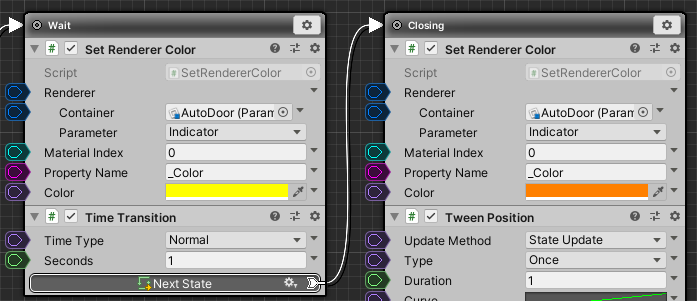
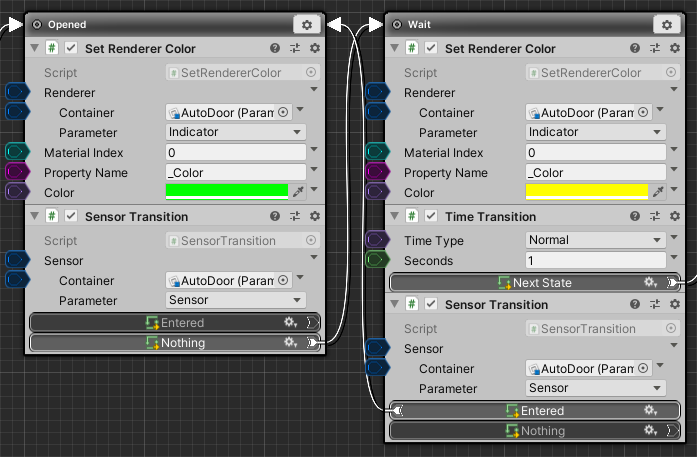
Wait state
If you start closing immediately after no one is gone, your movements will become sensitive when you repeatedly move in and out of the sensor, so give yourself some time to wait.
Here, the Wait state is set to wait for 1 second when it is fully opened and no one is present.
Indicator is yellow. After 1 second, it will transition to the Closing state.
Move node
Reserve a space for one node between the Opened state and the Closing state.
- Select the Closing state and the reroute node above Closing by range selection.
- Move it to the right by about 1 node.
Creating a Wait state
Create a Wait state on the right side of the node from Nothing in the Sensor Transition of the Opened state and connect it.
- Drag Nothing from Sensor Transition in the Opened state.
- Release on the right side of the node.
- Select “Create State” from the menu.
- Confirm the name as “Wait”.
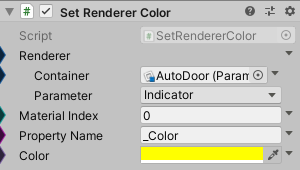
Copy and paste of SetRendererColor
Copy and paste SetRendererColor from the Opened state.
- Drag the title bar of SetRendererColor in the Opened state
- Hold down (Windows) Ctrl / (Mac) command and drop into Wait state.
SetRendererColor settings
Set SetRendererColor as follows.
| Color | Yellow(FFFF00) |
Add TimeTransition
Add a TimeTransition.
- Move the mouse cursor to the bottom center of the Wait state.
- Click the displayed “Insert Behaviour” button.
- Select “Add Behaviour” from the menu.
- Select “Transition > TimeTransition” from the behavior selection window.
TimeTransition settings
Set TimeTransition as follows.
| Seconds | 1 |
| Next State | Connect to Closing state. |
Operation check
Let’s play and check.
When it opens completely and exits the sensor, the Indicator turns yellow and begins to close after 1 second.
Improved Wait state
This state also has a flaw that was in the Closing state.
Even if you enter again while waiting, it will try to close forcibly after standing for 1 second.
However, the door itself does not move because it has already been improved in the Closing state, but the state itself has been transitioned.
(You can check by looking at the Arbor Editor window or by checking if the Indicator color has switched.)
If you come inside the sensor while waiting, return it to the Opened state.
Copy and paste of SensorTransition
Copy and paste the SensorTransition from the Closing state.
- Drag the title bar of the Sensor Transition in the Closing state
- Hold down (Windows) Ctrl / (Mac) command and drop at the bottom of the Wait state.
Sensor Transition settings
Set the SensorTransition as follows.
| Entered | Connect to the Opened state. |
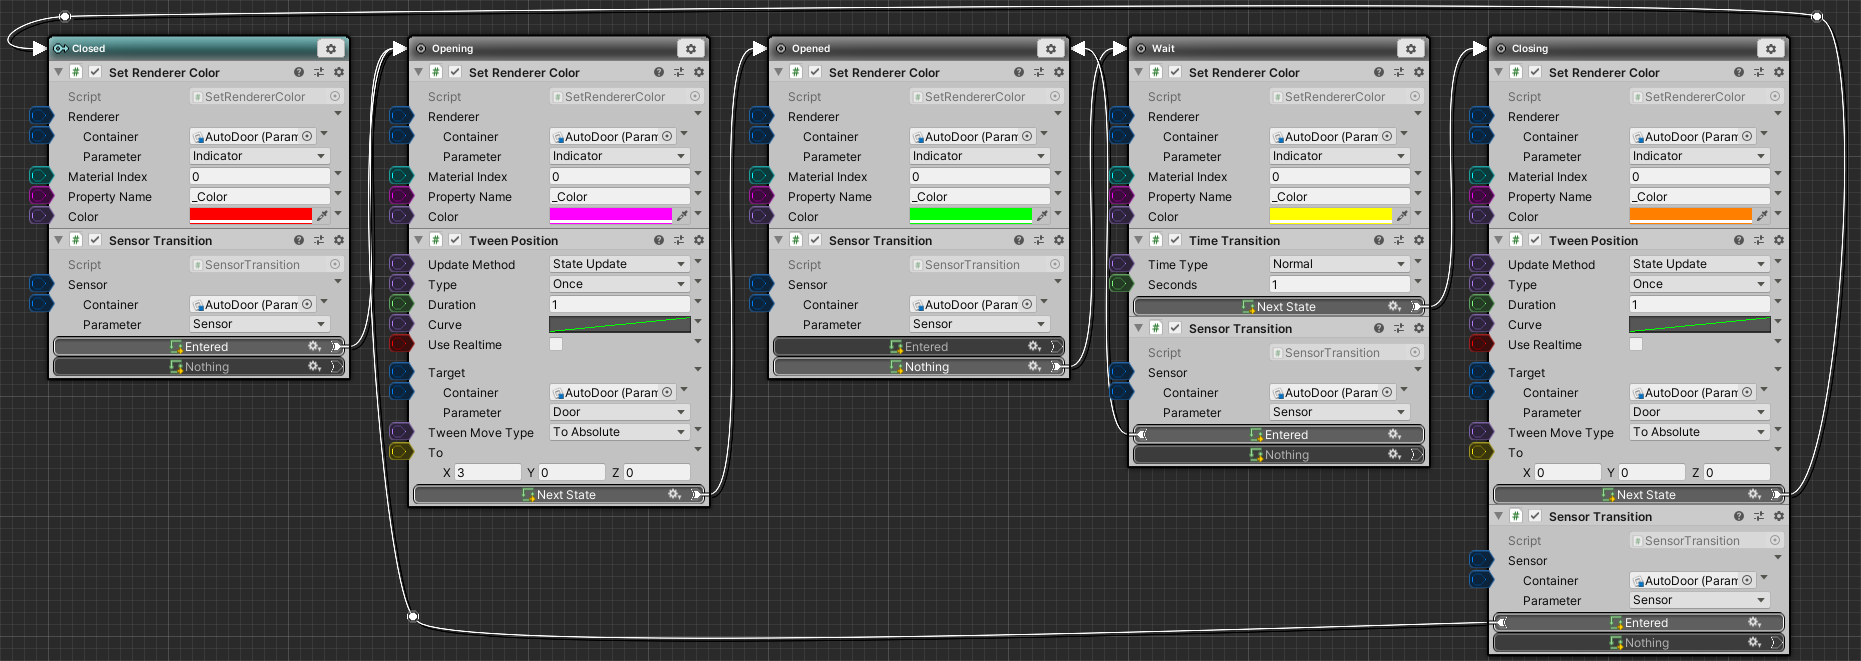
The final ArborFSM for AutoDoor looks like this:
Final confirmation
Finally, play again to see if the In and out of the sensor, the automatic door interlocking, and the Indicator color are correct.
This is the end of this tutorial.
Challenge
Finally, I will describe some issues as a step up from this tutorial, so please refer to it.
Improved movement speed
As mentioned in “Supplementary information on reopening operation“, TweenPosition is a behavior that performs time-specified movement interpolation.
For example, if you enter the sensor immediately after switching from the Wait state to the Closing state, the Opening state will always be executed for 1 second even though the door is almost open (Indicator becomes magenta for 1 second).
Since we want to improve the slowdown of the movement speed due to the transition timing, we need a movement interpolation script that specifies the speed.
As of Arbor3.9.0, the behavior of interpolating the start point and end point by specifying the speed is not built in, so please make your own script and improve it.
Practical realization
The script is simplified in this tutorial for illustration purposes.
The sensor can be widely used not only for automatic doors like this one, but also for visual judgment of enemy AI and weight detection switch, so it would be good to put it to practical use.
Improved Sensor script
- Since the Player tag is fixed, it will be possible to flexibly mask with multiple tags and layers.
- Due to the specifications of Unity, OnTriggerExit is not called when Destroy is done in the trigger, so deal with it.
- If you can get the closest target from _EnteredObjects, you can use it for enemy AI.
- Callback the moment something enters or exits
- When there are multiple Colliders in the child object, specify whether to treat them individually or as characters.
- Via Collider.attachedRigidbody, etc.
- Exclusion of objects hidden in obstacles
- A function that does not detect when an object that has entered the sensor is hidden by another obstacle.
- Detects whether there is an obstacle between the sensor and the target, such as by making a judgment with Raycast.
- Organize the trigger judgment part and the object management class contained in the sensor.
- TriggerSensor is created separately and derived from the Sensor class.
- The Sensor class only manages incoming and outgoing objects.
- Trigger Sensor only registers / unregisters objects that have entered / exited with OnTriggerEnter / Exit.
- The RaycastSensor script to be judged by Raycast is also created by deriving from the Sensor class as needed.
- Add the signal strength (additional factors such as weight) of the contained object.
- Add a SignalWeight script to allow you to set the signal strength.
- Sensor gets the SignalWeight component of the incoming and outgoing objects and sums the signal strengths.
- In addition, a function to attenuate the signal strength depending on the distance and line-of-sight direction has been added as needed.
Improved SensorTransition script
- Comparison calculation with what body (or signal strength).
- Further condition judgment such as tags and layers is performed.
Add SensorEnterTransition / SensorExitTransition script
- The transition between the moment you enter and the moment you leave.
- Output the in and out target with OutputSlotGameObject so that it can be targeted.
Add GetSensorClosestObjectCalculator script
- A script for compute nodes that returns the closest target in the sensor.
Decorator
- Create a Decorator script as well as a StateBehaviour script.
Since it is difficult to make a practical sensor system in earnest, I think it would be good to introduce sensor assets made by other companies and create only the script used in the graph of Arbor.