
This is the documentation for Arbor 3.2.4 and earlier.
See Arbor Documentation for the latest documentation.
Arbor has a function to pass data between nodes of the graph.
Contents
Data flow
Connecting data input / output slots allows you to take advantage of data flow.
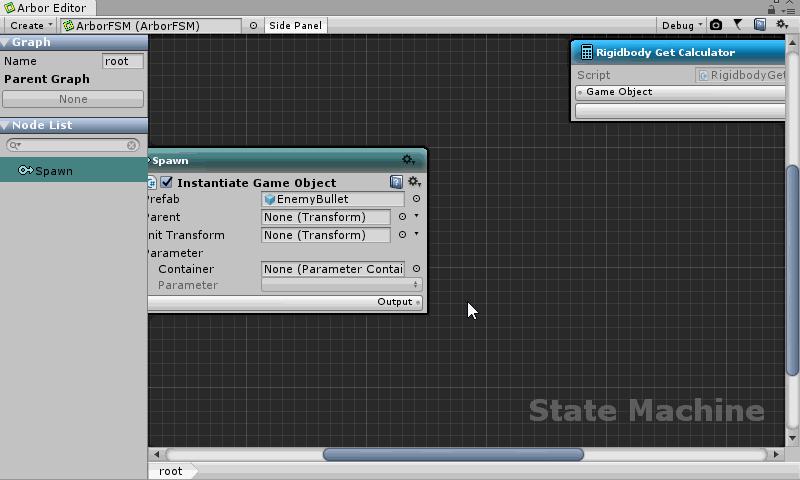
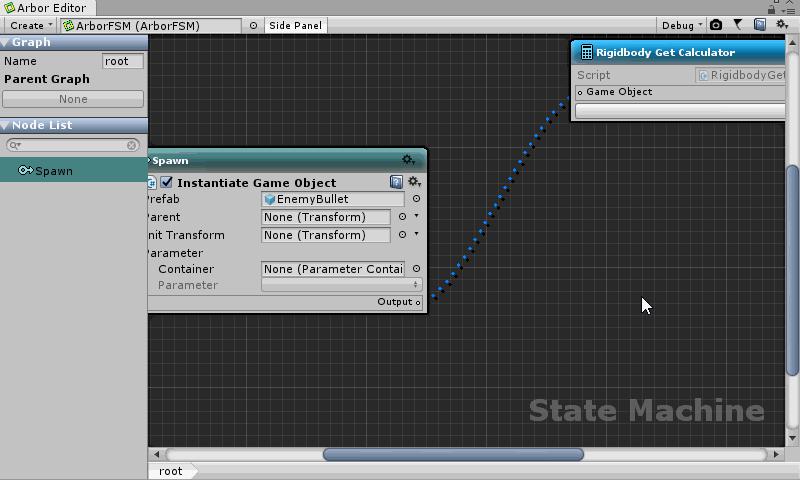
Example
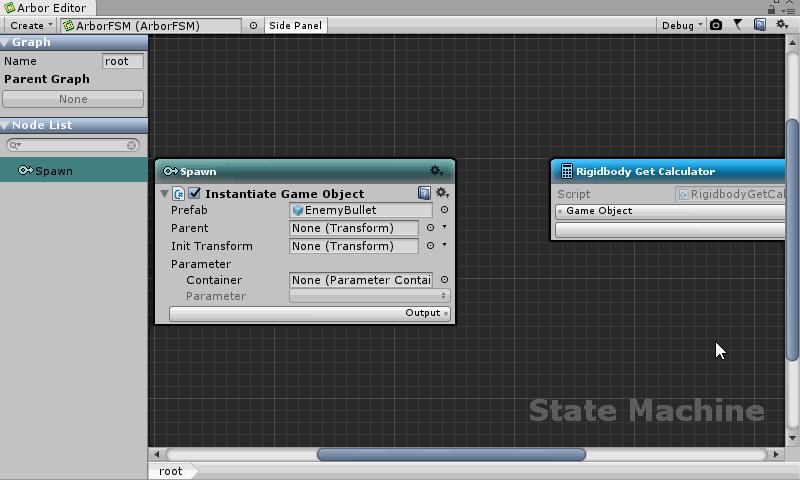
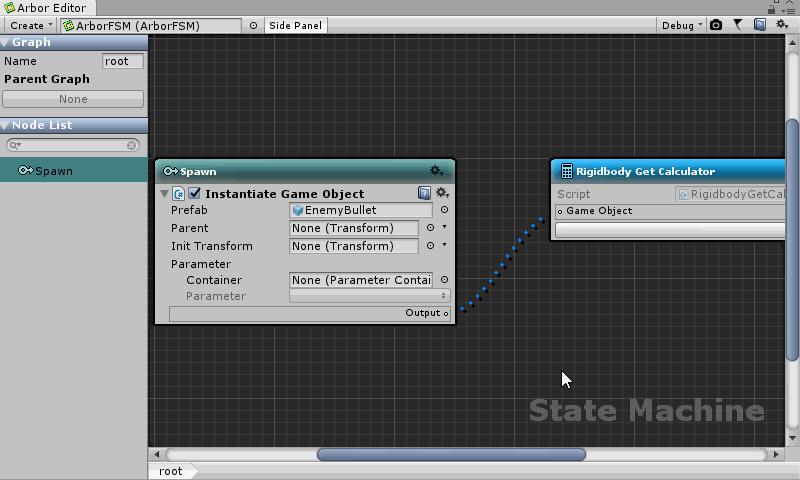
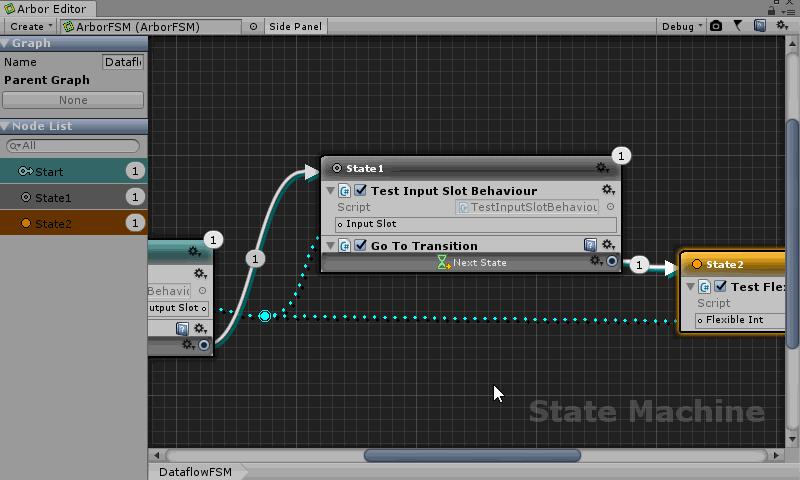
In the example using the built-in script, the following data flow can be easily assembled.
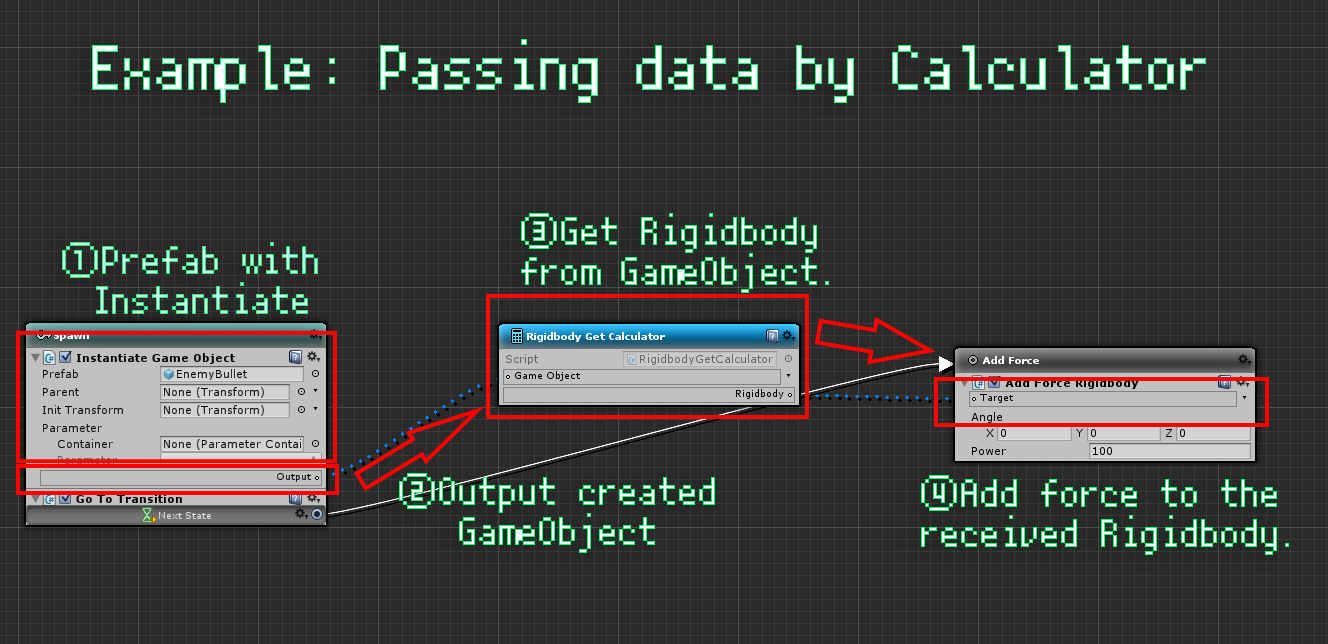
- InstantiateGameObject instantiated prefab.
- Output instantiated GameObject.
- Get the Rigidbody component with Rigidbody.Get.
- Add force with AddForceRigidbody to the received Rigidbody.
Data flow can be used in BehaviourTree as well.
Reference link
- StateBehaviour : InstantiateGameObject
- StateBehaviour : AddForceRigidbody
- Calculator : Rigidbody.Get
How to use data slots
Connect
- Drag the data slot field.
- Drop into a pair of slots of the same type.
Diconnect
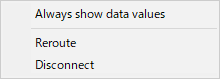
- Right click on the connection line.
- Select “Disconnect”
FlexibleField
In the fields of the FlexibleField related class, you can select multiple reference methods, so you can flexibly set values.
Selection type
- Click the
 button next to the field.
 - Select type.
Types
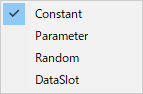
| Item | Contents |
|---|---|
| Constant | Constant value. |
| Parameter | Refer to parameters. For parameters, see the Manual : ParameterContainer. |
| Random(Numeric type only) | Randomly obtain from the specified range. |
| DataSlot | Input slot of data. |
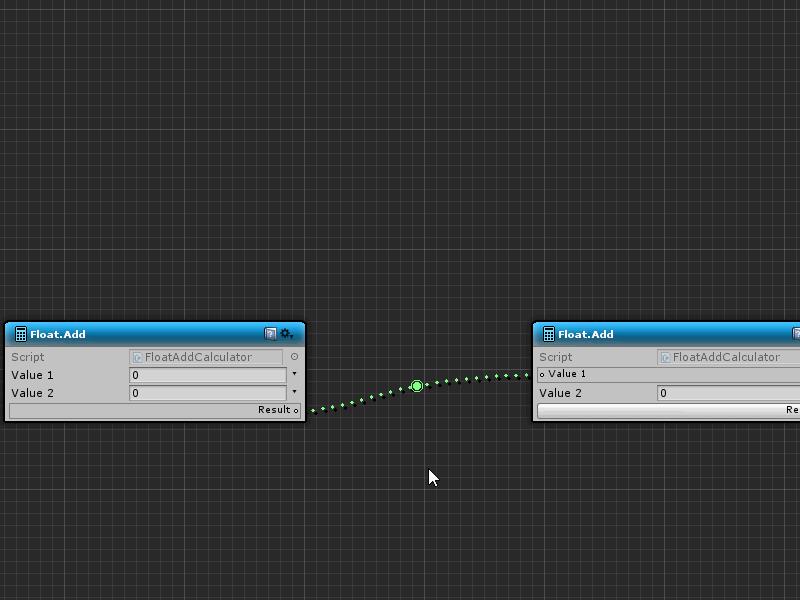
Reroute node
Using the reroute node makes it easier to organize the data flow lines.
Create a reroute node and connect
- Drag the data slot field.
- Drop at the position in the graph where you want to create a reroute node
- Select “reroute” in the menu
Insert reroute node
- Right-click the position where you want to create a reroute node on the connection line.
- Select “reroute” in the menu.
Change direction of reroute node
- Select reroute node to change direction
- Drag the direction icon to change it.
About connection line
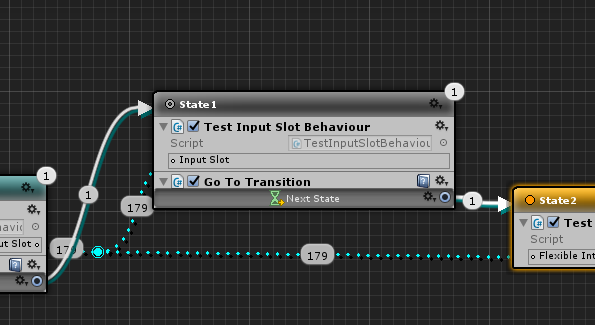
Show Value
If you hover over the connection line while playing, the current value will be displayed.
Also, if you select “Always show data value” from the right-click menu of the connection line, it will be displayed even without mouseover.
If you want to display the values of all the connection lines, selecting “Show all data values” from the “Debug” menu on the toolbar will toggle.
Right-click on the connection line to display the menu.
| Item | Contents |
|---|---|
| Always show data values | Always show data values when playing. |
| Reroute | Insert the reroute node. |
| Disconnect | Disconnect it. |
About calculator node
A calculator node is a node for calculation with data input / output.
You can do numerical calculations and access fields for output.
Creating a calculator node
- Right-click the appropriate position of Arbor Editor.
- Click on the “Create Calculator”.
- Select the calculator node you want to create from the list.
Built-in Calculator
Calculator nodes that are used frequently are prepared from the beginning.
Arbor Reference : Calculator Reference
Scripting
Output slot
Data can be output by declaring an output slot such as OutpotSlotInt.
Example script
Create a TestOutputSlotBehaviour script file and write the following code.
using UnityEngine;
using Arbor;

[AddComponentMenu("")]
public class TestOutputSlotBehaviour : StateBehaviour
{
	public OutputSlotInt outputSlot;

	public override void OnStateBegin()
	{
		outputSlot.SetValue(Random.Range(100, 200));
	}
}
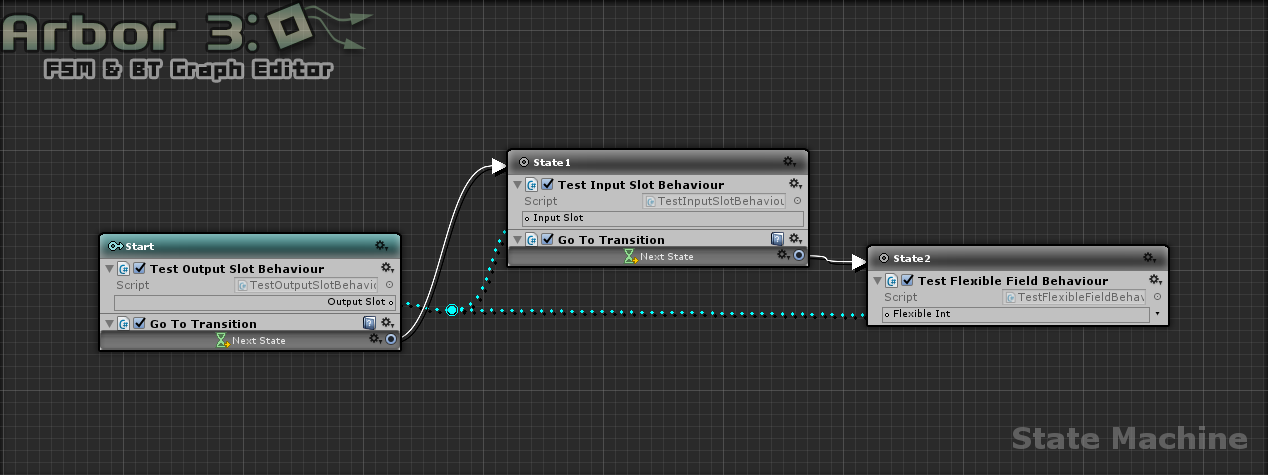
When this script is added to the state of ArborFSM, it becomes as follows.

Output slot class
- OutputSlotInt
- OutputSlotFloat
- OutputSlotBool
- OutputSlotGameObject
- OutputSlotString
- OutputSlotVector2
- OutputSlotVector3
- OutputSlotQuaternion
- OutputSlotRect
- OutputSlotBounds
- OutputSlotColor
- OutputSlotTransform
- OutputSlotRectTransform
- OutputSlotRigidbody
- OutputSlotRigidbody2D
- OutputSlotComponent
- OutputSlotLong
- OutputSlotCollider
- OutputSlotCollider2D
- OutputSlotCollision
- OutputSlotCollision2D
- OutputSlotRaycastHit
- OutputSlotRaycastHit2D
- OutputSlotUnityObject
- OutputSlotAny
Input slot
Data can be output by declaring an input slot such as InputSlotInt.
Example script
Create a TestInputSlotBehaviour script file and write the following code.
using UnityEngine;
using Arbor;

[AddComponentMenu("")]
public class TestInputSlotBehaviour : StateBehaviour
{
	public InputSlotInt inputSlot;

	public override void OnStateBegin()
	{
		int intValue = 0;
		if (inputSlot.GetValue(ref intValue))
		{
			Debug.Log("inputSlot : " + intValue);
		}
		else
		{
			Debug.LogWarning("inputSlot : not connected.");
		}
	}
}
When this script is added to the state of ArborFSM, it becomes as follows.

Input slot class
- InputSlotInt
- InputSlotFloat
- InputSlotBool
- InputSlotGameObject
- InputSlotString
- InputSlotVector2
- InputSlotVector3
- InputSlotQuaternion
- InputSlotRect
- InputSlotBounds
- InputSlotColor
- InputSlotTransform
- InputSlotRectTransform
- InputSlotRigidbody
- InputSlotRigidbody2D
- InputSlotComponent
- InputSlotLong
- InputSlotCollider
- InputSlotCollider2D
- InputSlotCollision
- InputSlotCollision2D
- InputSlotRaycastHit
- InputSlotRaycastHit2D
- InputSlotUnityObject
- InputSlotAny
FlexibleField
FlexibleField is useful for not only input slots but also constant values and parameters.
Example script
Create a TestFlexibleFieldBehaviour script file and write the following code.
using UnityEngine;
using Arbor;

[AddComponentMenu("")]
public class TestFlexibleFieldBehaviour : StateBehaviour
{
	public FlexibleInt flexibleInt;

	public override void OnStateBegin()
	{
		Debug.Log("flexibleInt : " + flexibleInt.value);
	}
}
Add this script to the ArborFSM state and set the reference type to Calculator as follows.

- FlexibleInt
- FlexibleFloat
- FlexibleBool
- FlexibleGameObject
- FlexibleString
- FlexibleVector2
- FlexibleVector3
- FlexibleQuaternion
- FlexibleRect
- FlexibleBounds
- FlexibleColor
- FlexibleTransform
- FlexibleRectTransform
- FlexibleRigidbody
- FlexibleRigidbody2D
- FlexibleComponent
- FlexibleLong
- FlexibleField<T>
(Inherit and use it)
Type constraints of slots
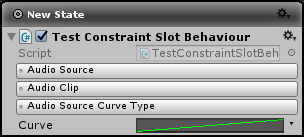
For InputSlotAny and InputSlotComponent, you can specify type constraints with attributes.
Example script
using UnityEngine;
using Arbor;

[AddComponentMenu("")]
public class TestConstraintSlotBehaviour : StateBehaviour
{
	[ClassExtends(typeof(AudioSource))]
	public InputSlotComponent audioSource = new InputSlotComponent();

	[ClassExtends(typeof(AudioClip))]
	public InputSlotUnityObject audioClip = new InputSlotUnityObject();

	[ClassExtends(typeof(AudioSourceCurveType))]
	public InputSlotAny audioSourceCurveType = new InputSlotAny();

	public FlexibleAnimationCurve curve = new FlexibleAnimationCurve(AnimationCurve.Linear(0, 0, 1, 1));

	public override void OnStateBegin() {
		AudioSource source_ = audioSource.GetValue<AudioSource>();
		AudioClip clip_ = audioClip.GetValue<AudioClip>();
		AudioSourceCurveType curveType_ = AudioSourceCurveType.CustomRolloff;
		audioSourceCurveType.GetValue<AudioSourceCurveType>(ref curveType_);

		AnimationCurve curve_ = curve.value;

		if (source_ == null || clip_ == null)
		{
			return;
		}

		source_.clip = clip_;
		source_.SetCustomCurve(curveType_, curve_);
	}
}
Available Attributes
| Class | Attribute |
|---|---|
| OutputSlotAny | |
| InputSlotAny |
|
| InputSlotComponent |
It is also constrained to the Component class. |
| InputSlotUnityObject |
It is also constrained to the UnityEngine.Object class. |
| FlexibleComponent |
It is also constrained to the Component class. |
Customize
Create data slot
You can also create a data slot of your own class.
For details, refer to “Customize Data Slot”.
Variable
If you also create a parameter, you can create it easily using Variable Generator.
For details, see “Customizing parameters with Variable”.
Manual : Customizing parameters with Variable
Calculator node
You can also create scripts to use for calculator nodes.
For details, see “Customize Calculator”.