
This is the documentation for Arbor 3.2.4 and earlier.
See Arbor Documentation for the latest documentation.
To customize StateBehaviour, you need to create a script file for StateBehaviour and describe what you want to do.
Contents
Create StateBehaviour script file
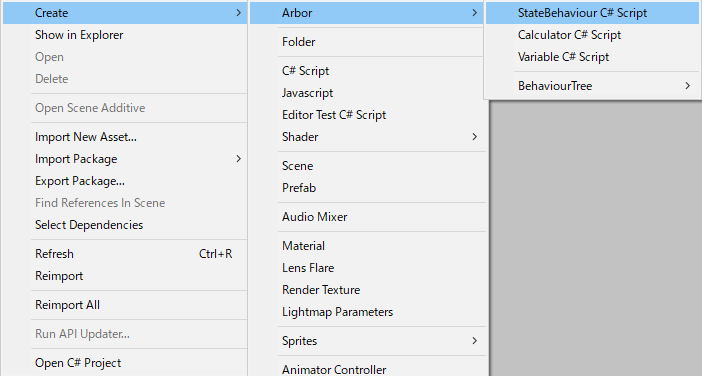
- Right-click on the location you want to create from the Project window.
- From the right-click menu, and select “Create> Arbor > State Behaviour C# Script”.
- Determined to enter the file name
Function to be called
By assigning the created StateBehaviour to the state in ArborEditor, each function of the script will be called.
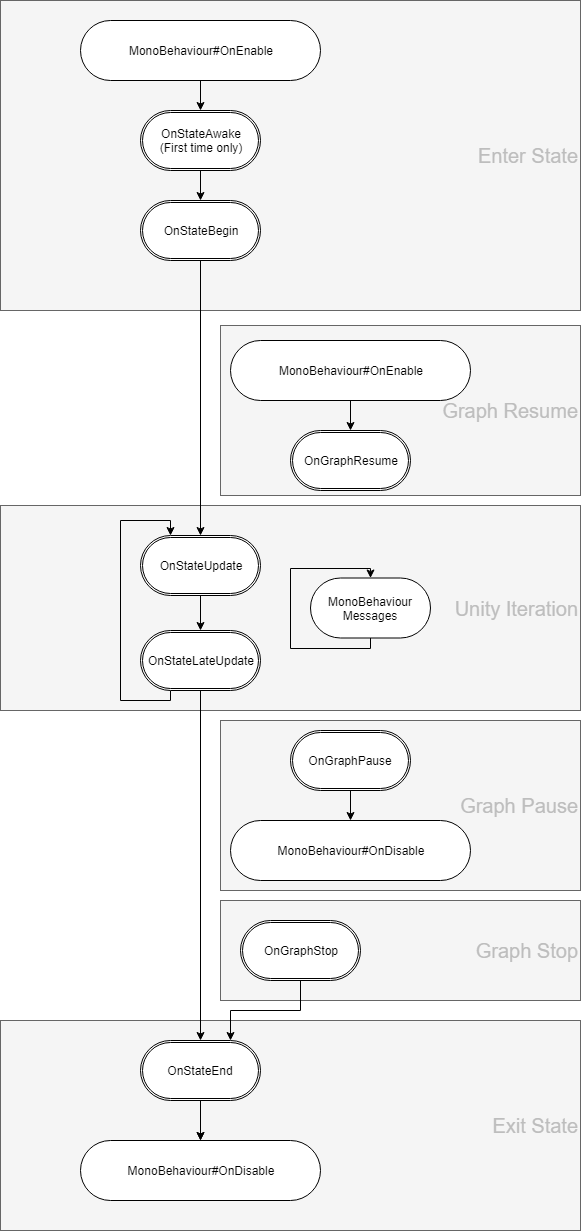
- OnStateAwake
It is called when it first enters the state. - OnStateBegin
It is called when transitioning to state. - OnStateUpdate
It will be called every frame at the timing of Update() of MonoBehaviour. - OnStateLateUpdate
It will be called every frame at the timing of LateUpdate() of MonoBehaviour. - OnStateEnd
It is called when leaving the state. - MonoBehaviour message functions
For details, please see the MonoBehaviour Messages of Unity ScriptReference.
Execution Order
- OnStateAwake / OnStateBegin / OnStateUpdate / OnStateLateUpdate / OnStateEnd is called in order from the top attached to the state node in Arbor Editor.
- MonoBehaviour messages are invoked according to the order of execution by Unity.
For details, refer to Execution Order of Event Functions in Unity Manual.
Variables and Arbor Editor
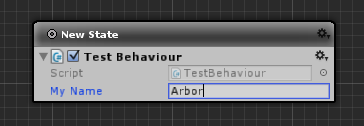
You can edit it in Arbor Editor by declaring a variable with public or SerializeField attribute added to the created script.
using UnityEngine;
using System.Collections;
using Arbor;

public class TestBehaviour : StateBehaviour {
	public string myName;
}
State connection
Add field
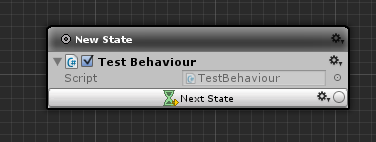
By declaring StateLink with the public or SerializeField attribute added to the created script, connection slots will be displayed in Arbor Editor.
using UnityEngine;
using System.Collections;
using Arbor;

public class TestBehaviour : StateBehaviour {
	public StateLink nextState;
	// Hereinafter abbreviated
}
Transition to connection destination
It is referred to as the Transition in the transition you want to timing.
Transition( nextState );
Data input slot
Add field
An input slot is displayed by declaring InputSlotInt, InputSlotFloat etc. with public or SerializeField attribute added to the created script.
Please refer to the script reference for available InputSlot.
using UnityEngine;
using Arbor;

public class TestBehaviour : StateBehaviour
{
	public InputSlotInt slotInt;
	// Hereinafter abbreviated
}

Get value
To get the value we use the GetValue method.
int data = 0;
slotInt.GetValue(ref data);
Debug.Log("Value " + data);
Flexible version data input
Add field
If you declare FlexibleInt, FlexibleFloat etc. with public or SerializeField attribute added to the script you created, Flexible data setting fields will be displayed.
Please refer to the script reference for available classes.
using UnityEngine;
using Arbor;

public class TestBehaviour : StateBehaviour
{
	public FlexibleInt flexible;
	// Hereinafter abbreviated
}
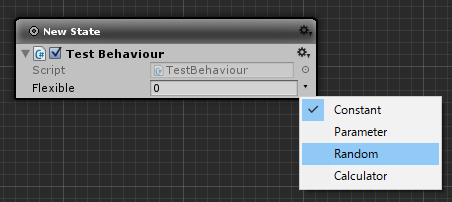
If you select Calculucator in ArborEditor window accepts an input from the calculator node.
Get value
To retrieve the value, use the value property.
Debug.Log("Value " + flexible.value);
Data output slot
Add field
Output slots are displayed by declaring OutputSlotInt, OutputSlotFloat etc. with public or SerializeField attribute added to the created script.
Please refer to the script reference for available OutputSlot.
using UnityEngine;
using Arbor;

public class TestBehaviour : StateBehaviour
{
	public OutputSlotInt slotInt;
	// Hereinafter abbreviated
}

Setting value
To set the value to use the SetValue method.
slotInt.SetValue(10);