This time we will use AgentController and Behaviour Tree to explain how to make AI agent to chase players.
Contents
Prior knowledge
- Basics of C#
- Unity Manual “Scripting“
- Behaviour tree basics
Operating environment
This tutorial is created in the following environment.
| Unity | 2019.4.39f1 |
| Arbor | 3.9.0 |
If you use a different version, please read as appropriate because there may be some differences from the explanation.
Preparation of tutorial project
Create project
First of all, please create a project for the tutorial.
| Project Name | ArborTutorial05 |
| Templete | 3D |
| Assets to import |
|
For information on creating projects and importing Arbor, please refer to “Preparation for using Arbor”.
We will also use Characters of Standard Assets this time, so do not forget to import.
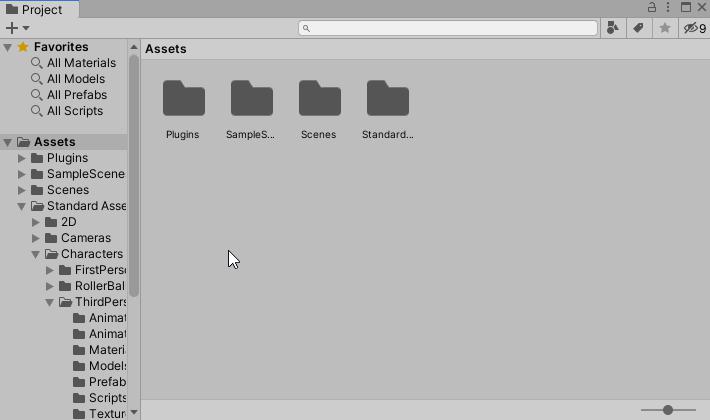
Standard Assets
Download Standard Assets from the Asset Store.
It is a free asset released by Unity official. There is no cost.
- Open “Standard Assets (for Unity 2018.4)” page in the Asset Store.
- If the “Add to My Assets” button is displayed, click this button.
- Return to Unity and select “Window> Package Manager” from the menu.
- Changed the package scope dropdown (second dropdown from the left of the toolbar) to “My Assets”.
- Enter “Standard Assets” in the search bar and select “Standard Assets (for Unity 2018.4)”.
- If you haven’t downloaded it, click the “Download” button.
- Click the “Import” button.
- In the Import Unity Package dialog, click the “Import” button with all assets selected.
Delete SimpleActivatorMenu.cs
When importing, a compilation error occurs in “Assets / Standard Assets / Utility / SimpleActivatorMenu.cs”.
This script will not be used this time, so delete SimpleActivatorMenu.cs.
Create Scene
Placement of 3D map
First, we will place a 3D map.
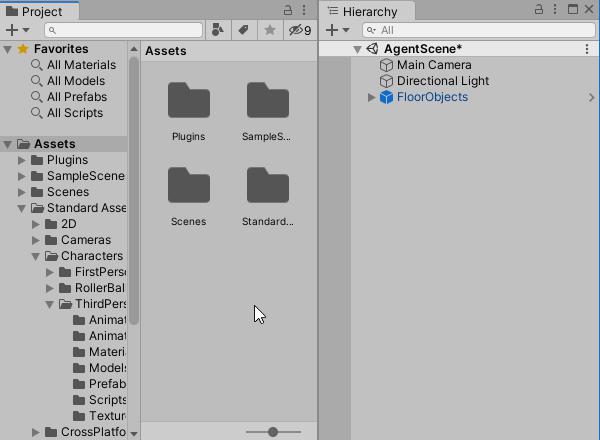
- Drag “Assets / Plugins / Arbor / Examples / Common / Prefabs / FloorObjects prefab” from the Project window.
- Drop into the Hierarchy window.

Save Scene
Save the scene once.
- Create if there is no “Assets/Scenes” folder in the Project window.
- Select “File > Save As” from the top menu.
- Save it as “AgentScene.unity” in the Scenes folder.
- Select “Window> AI> Navigation” from the top menu to display the Navigation window.
- Select “Bake tab” in the navigation window.
- Click the “Bake button”.
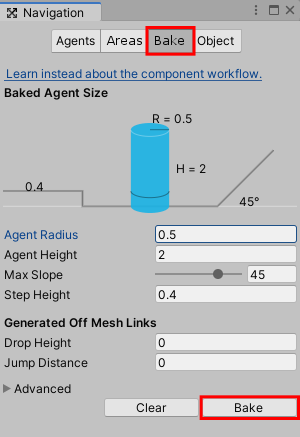
- Save over the scene.
Create Player
Placement of player
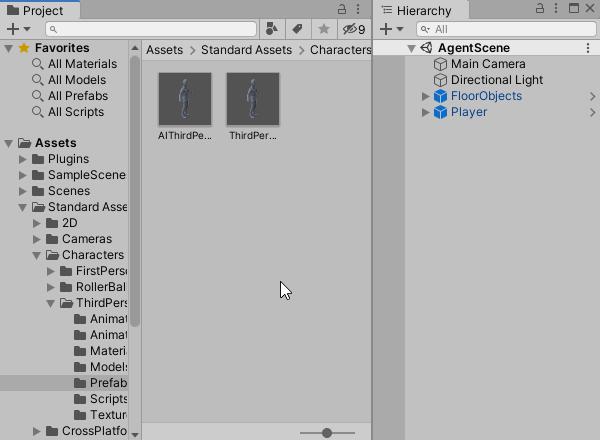
Players will use the ThirdPersonController prefab of Standard Assets as they are.
- Drag “Assets / Standard Assets / Characters / ThirdPersonCharacter / Prefabs / ThirdPersonController prefab” from the Project window.
- Drop into the Hierarchy window.
- Change GameObject name to Player.
- Change Transform as follows.
| Position | -5, 0, -5 |
![]()
Camera settings
Let the camera watch Player.
- Select MainCamera object.
- Change Transform as follows.
| Position | 0, 10, -30 |
![]()
- Change Camera as follows.
| Field of View | 40 |
- Click “Add Component” button.
- Select “Arbor > ArborFSM” from the component selection window.
- Click the “Open Editor” button to open the Arbor Editor.
- Right click on the graph.
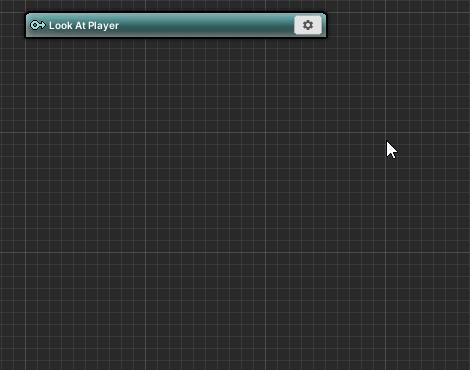
- Select “Create State” from the menu.
- Change the state name to “Look At Player” and confirm.

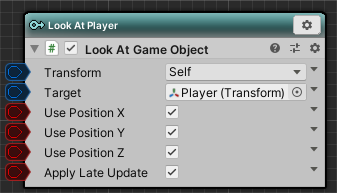
- Click the Look At Player state setting icon.
- Select “Add Behaviour” from the menu.
- Select “GameObject > LookAtGameObject” from the behavior selection window.
- Changed LookAtGameObject as follows.
| Target | Player object |
| Apply Late Update | Check |
Create Agent
Placement of character for agents
Place the character.
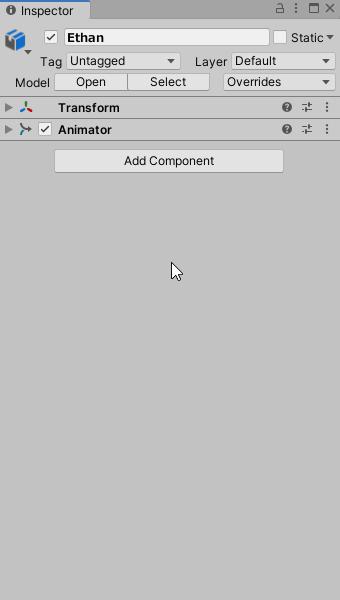
- Drag “Assets / Standard Assets / Characters / ThirdPersonCharacter / Models / Ethan model” from the Project window.
- Drop into the Hierarchy window.
- Change Transform as follows.
| Position | 5, 0, 5 |
![]()
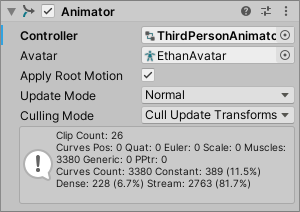
- Change Animator as follows.
| Controller | Assets / Standard Assets / Characters / ThirdPersonCharacter / Animator / ThirdPersonAnimatorController |
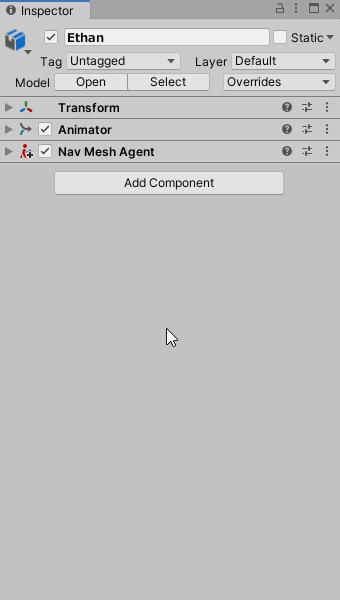
- Click “Add Component” button.
- Select “Navigation > NavMesh Agent” from the component selection window.
AgentController
AgentController is a component built into Arbor that moves in NavMeshAgent and controls Animator.
You can move it on ArborFSM or Behavior tree using Agent script.
See “AgentController” for more information.
Add AgentController
- Select the Ethan object in the Hierarchy window.
- Click the “Add Component” button in the Inspector window.
- Select “Arbor > Navigation > AgentController” from the component selection window.
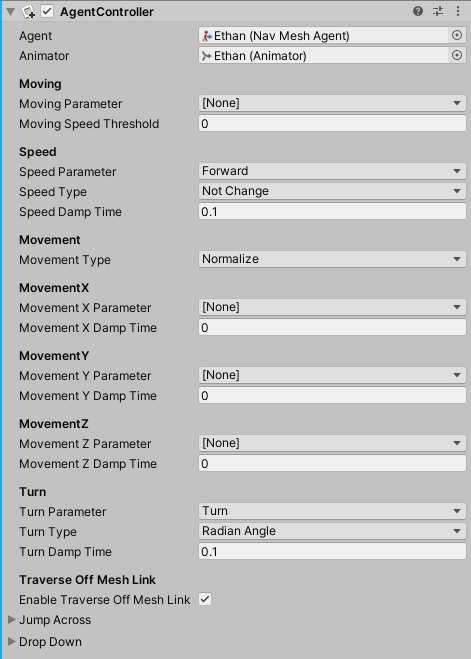
AgentController settings
We will set AgentController.
- Change AgentController as follows.
| Agent | NavMeshAgent in Ethan object |
| Animator | Animator in Ethan object |
| Speed Parameter | Forward parameter |
| Speed Damp Time | 0.1 |
| Turn Parameter | Turn parameter |
| Turn Damp Time | 0.1 |
Create AI
I will create an AI for the agent.
Add BehaviourTree
- If you do not select an Ethan object, select it in the Hierarchy window.
- Click “Add Component” button.
- Select “Arbor > BehaviourTree” from the component selection window.

Action to patrol Waypoint
Add an action to patrol Waypoint.
Create Waypoint
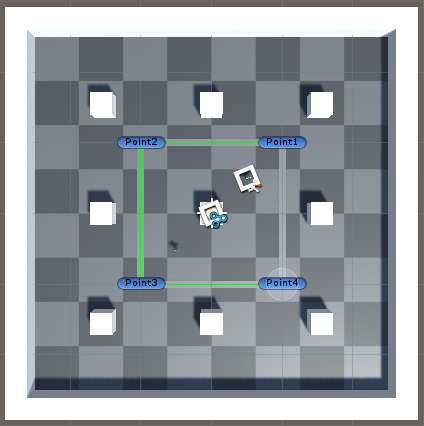
First, add Waypoint to the scene.
Waypoint is a component that manages the route point placed in the scene.
See “Waypoint” for more information.
- Click the + button on Hierarchy.
- Select “Arbor > Waypoint” from the menu.
- Create four empty GameObjects as children of the Waypoint object.
- Changed names to “Point 1” “Point 2” “Point 3” “Point 4” respectively.
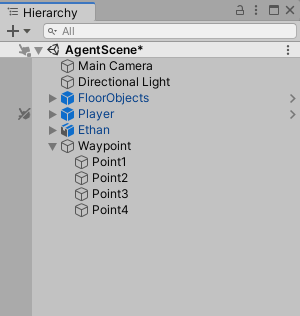
- Change icon of each Point object to label type.
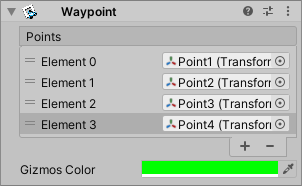
- Point 1 to 4 is set to Points of Waypoint.
- Set the Transform of Point1 as follows
| Position | 10, 0, 10 |
![]()
- Set the Transform of Point2 as follows
| Position | -10, 0, 10 |
![]()
- Set the Transform of Point3 as follows
| Position | -10, 0, -10 |
![]()
- Set the Transform of Point4 as follows
| Position | 10, 0, -10 |
![]()
It looks like the following when viewed from above in the scene window.
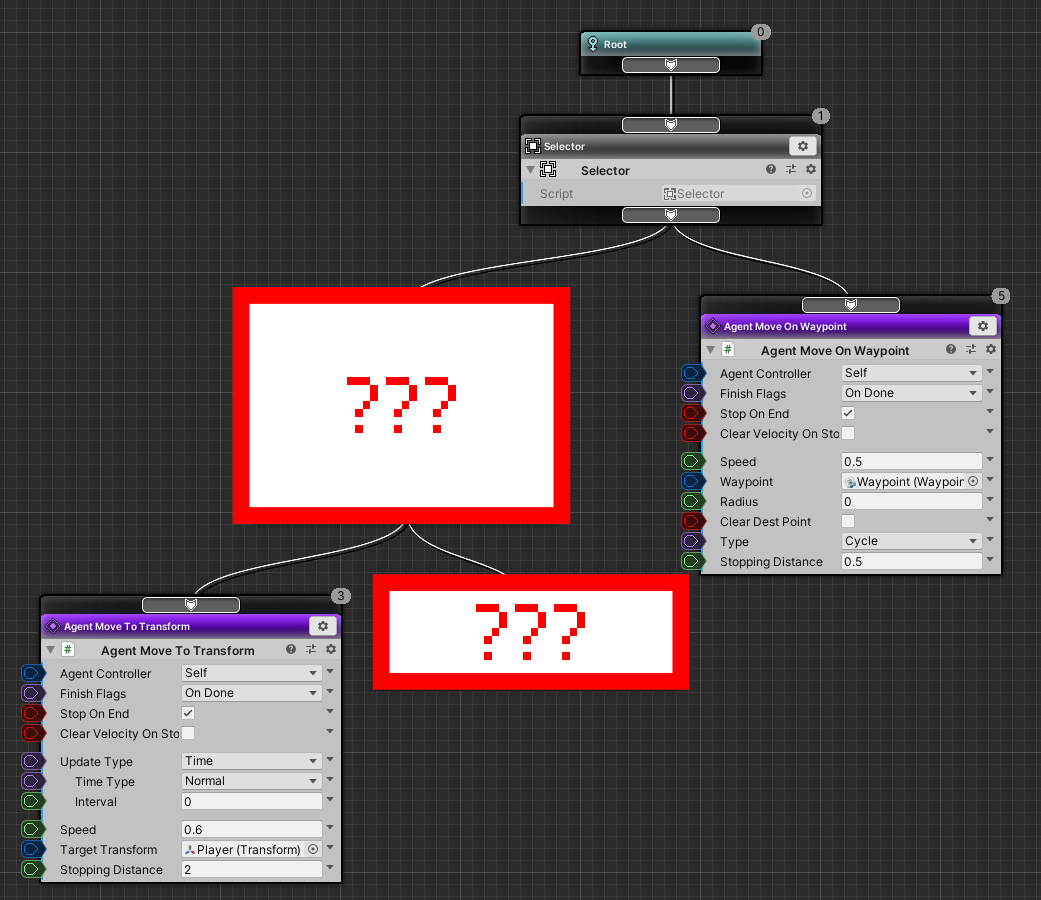
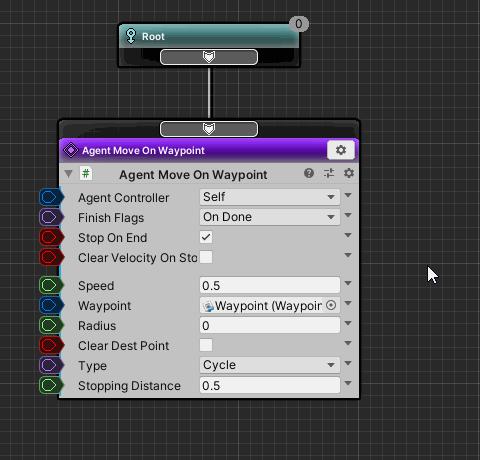
Add AgentMoveOnWaypoint action
The AgentMoveOnWaypoint action is an action to move the Agent along the Waypoint.
See “AgentMoveOnWaypoint” for more information.
- Select the Ethan object in the Hierarchy window.
- Click the “Open Editor” button of the BehaviourTree to open the Arbor Editor.
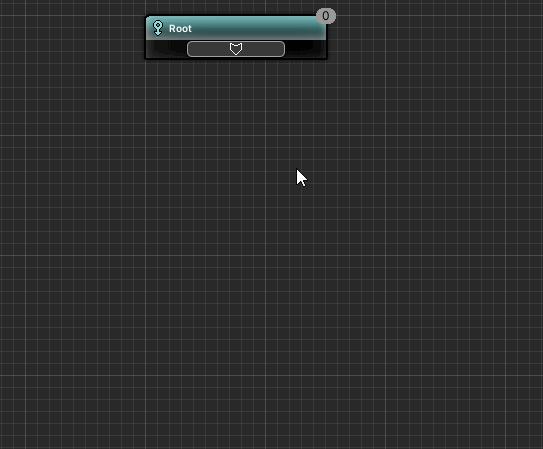
- Drag the slot at the bottom of the Root node and drop it under the Root node.
- Select “Create Action” from the menu.
- Select “Agent > AgentMoveOnWaypoint” from the action selection window.
- The name is fixed as it is.
AgentMoveOnWaypoint Settings
- Change AgentMoveOnWaypoint as follows.
| Speed | 0.5 |
| Waypoint | Waypoint object |
| Type | Cycle |
| Stopping Distance | 0.5 |

Play Check
Let’s Play and check it.
Regardless of the position of the player Ethan keeps circling the fixed route.
Action approaching Player
Let’s approach if Player is near to some extent.
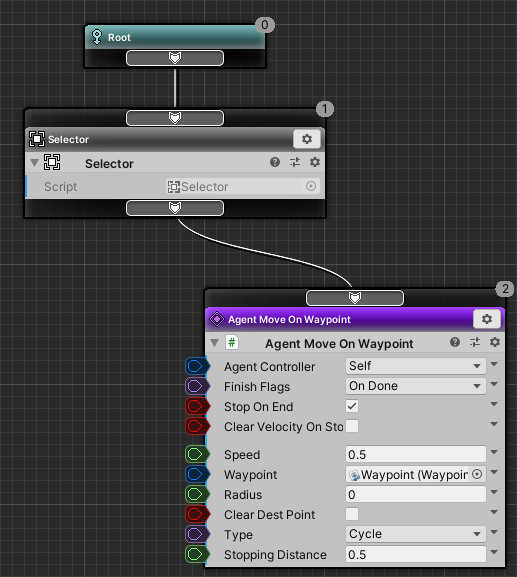
Add Selector Composite
Selector is a composite that executes child nodes in order from the left until it finds a child node that returns “success”.
See “Selector” for more information.
- Move the AgentMoveOnWaypoint action to the bottom right of the Root node.
- Drag the slot at the bottom of the Root node and drop it under the Root node.
- Select “Create Composite” from the menu.
- Select “Selector” from the composite selection window.
Connect Selector to AgentMoveOnWaypoint
- Drag the slot under the Selector node
- Connects to the top slot of the AgentMoveOnWaypoint node.
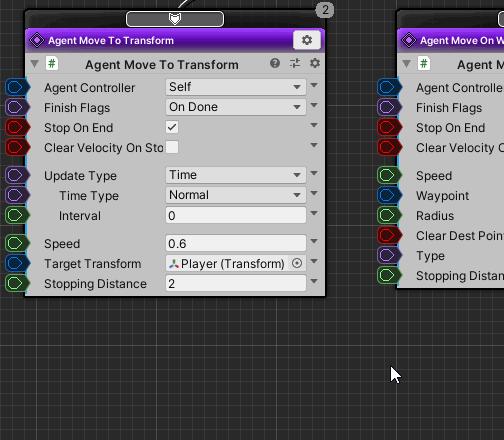
Add AgentMoveToTransform action
AgentMoveToTransform is an action to move the Agent closer to Target.
See “AgentMoveToTransform” for more information.
- Drag the slot at the bottom of the Selector node and drop it to the left of the AgentMoveOnWaypoint node.
- Select “Create Action” from the menu.
- Select “Agent > AgentMoveToTransform” from the action selection window.
AgentMoveToTransform settings
- Change AgentMoveToTransform as follows.
| Speed | 0.6 |
| Target Transform | Player object |
| Stopping Distance | 2 |
![]()
Creation of distance check decorator
This time, let’s make a script and judge the distance without using the existing decorator.
- Select the Assets folder in the Project window.
- Click the + button.
- Select “Arbor > BehaviourTree > Decorator C # Script” from the menu.
- Decided by setting the script name to “MyDistanceCheck”.
-
When you select from the menu, the name input mode is automatically set.Enter the name in that state and confirm.
- If you decide once with the default name, or if you change the name by mistake later, you need to change the class name as well.
If you don’t know where to fix the code, delete the script and recreate it.
-
- Open MyDistanceCheck file in script editor.
- Enter the following code.
I will briefly explain the contents of the script
- Specify the opponent’s Transform in _Target.
- Specify the distance to be judged in _Distance.
- The OnConditionCheck method calculates the distance between its own transform and _Target, and returns true if it is less than or equal to _Distance.
Distance judgment by MyDistanceCheck
Let’s set MyDistanceCheck to run AgentMoveTransition node by distance.
- Click the AgentMoveToTransition node setting icon.
- Select “Add Decorator” from the menu.
- Select “Scripts > MyDistanceCheck” from the decorator selection window.
- Change MyDistanceCheck as follows.
| Abort Flags (dropdowns that are Nothing) | Everything |
| Target | Player object |
| Distance | 10 |
![]()
Play Check
Let’s play and check it.
- As you approach the Ethan object within 10 meters by manipulating the player, Ethan also approaches the player.
- Conversely, when the player leaves 10 meters, he will return to patrol.
In this way, it is better to remember that nodes are executed in order from the left, decorators judge whether they can be executed, and control interrupts and interrupts.
Next step
In this time I created an AI that approaches Player using AgentController and Behaviour Tree.
In an actual game, most cases take actions such as attacking after getting close to Player to some extent.
I will finish this tutorial as a task for you “How to make Ethan a better AI”.
Attack action tips
- When AgentMoveToTransform approaches StoppingDistance, execution is terminated as “Successful”.
- Use “Sequencer” to execute child nodes from left to right as long as the child node returns “success”.
- You can also add decorators to composite nodes, and if AbortFlags has the Self flag, run child nodes as long as the decorator’s conditions are met.
- You can run a child state machine by using “SubStateMachine” as an action.
- In ArborFSM, you can use “EndStateMachine” to return the result to the parent graph.
- How to make an attack by a state machine will be helpful as “Let’s make an enemy of 2DSTG”.
For example:- Prepare a prefab for bullets.
- The child state machine uses “InstantiateGameObject” to fire bullets at regular intervals.
- Ethan has no attack motion, so you need to prepare it separately if necessary.
- Hit & damage judgment is omitted here. Please refer to Unity Learn etc.
- Bullet firing and hit detection may be complicated and difficult if you are not familiar with Unity itself.
First, create a temporary ActionBehaviour script called Attack and just output a log.
For ActionBehaviour scripts, please refer to “How to write an ActionBehaviour scripts“.